Create a Pipeline
 Updated
by
Amy Thomas
Updated
by
Amy Thomas
Instead, we recommend setting up a job with all the settings you wish to use regularly. You can then duplicate that job and update the copy with the details for the new job (for example, job title, test battery, interview template).
Want to customise the hiring funnel for each job? You can customise pipelines for each job to meet your hiring process needs.
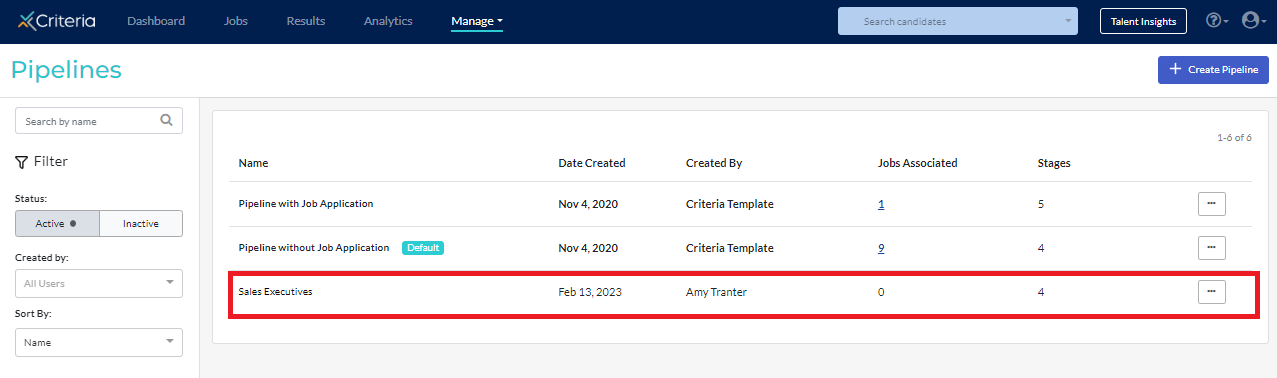
Creating a new pipeline
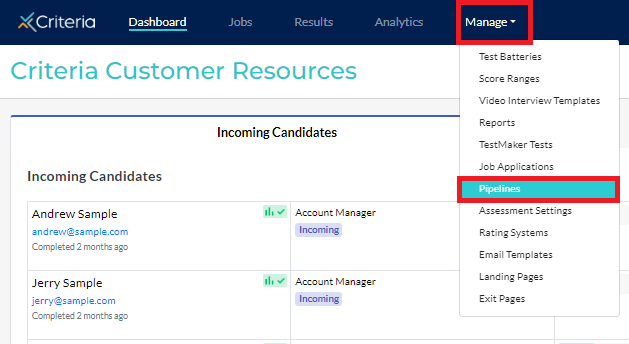
- Click Manage in the top navigation bar, then click Pipelines.
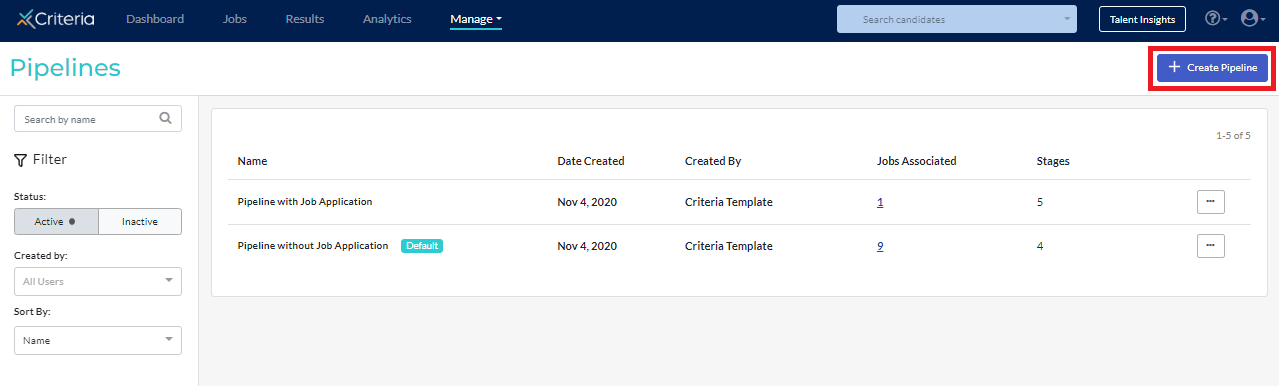
- Click Create Pipeline.
- Enter a name for your pipeline.
- To add a stage, enter a name for the stage, then click Add Stage.
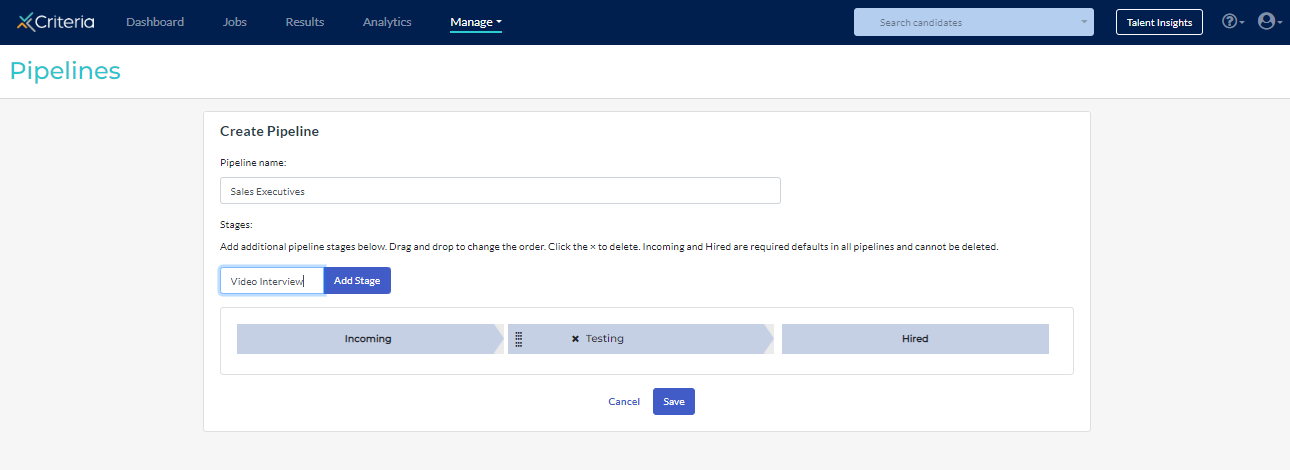
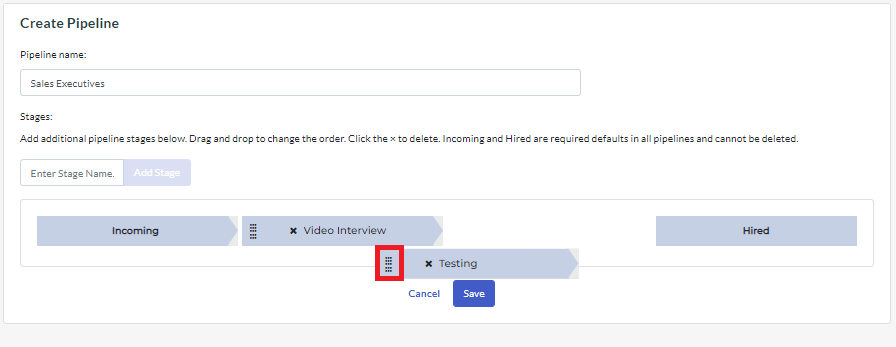
- To rearrange the order of the pipeline stages, click the stacked dashes icon to drag and drop the stages you have added.
- Click Save. You can now use the pipeline for any jobs in your Criteria account.
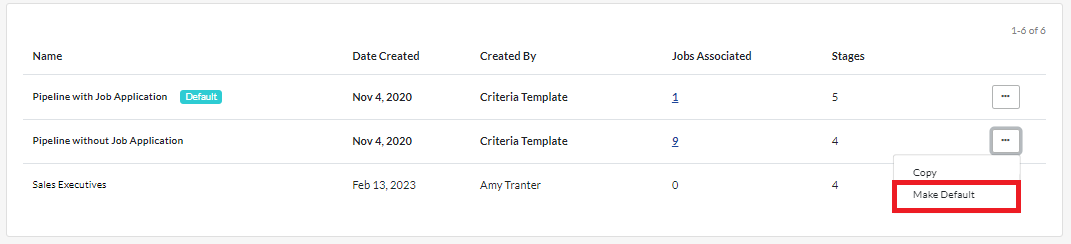
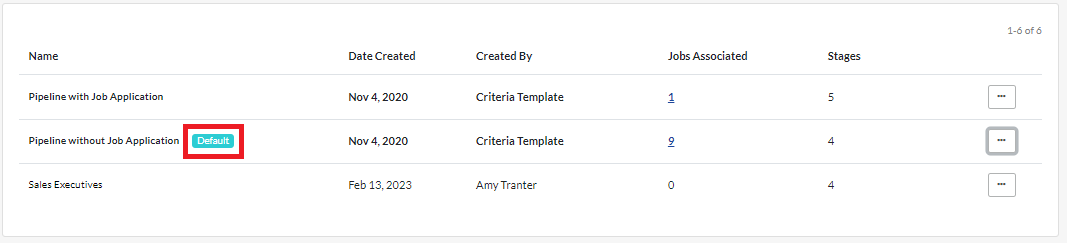
Setting a default pipeline
You may find that you are using the same pipeline stage for most of the jobs you are recruiting for. To save time, you can select that pipeline as the default for your Criteria account, so each time a new job is created, it will automatically use that pipeline.
- In the Pipelines area, click ... More Actions next to the pipeline that is to be the default.

- Select Make Default from the dropdown list.
- From this point onwards, any new jobs that are created will use automatically use this pipeline.
Changing the pipeline in a job
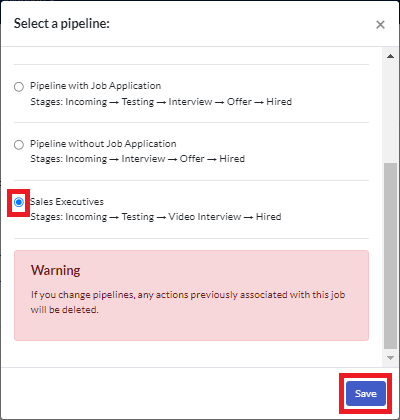
We recommend only changing the pipeline for a job if no candidates are associated with the job. (If candidates are in a pipeline stage that does not exist in the new pipeline selected, this could impact their location in the job and any automated tasks set up for the job.)
- Locate the job in your Criteria account and go to the Job Settings screen.

- Scroll down to Pipelines & Automation and click Edit.

- Click Edit next to the current pipeline.
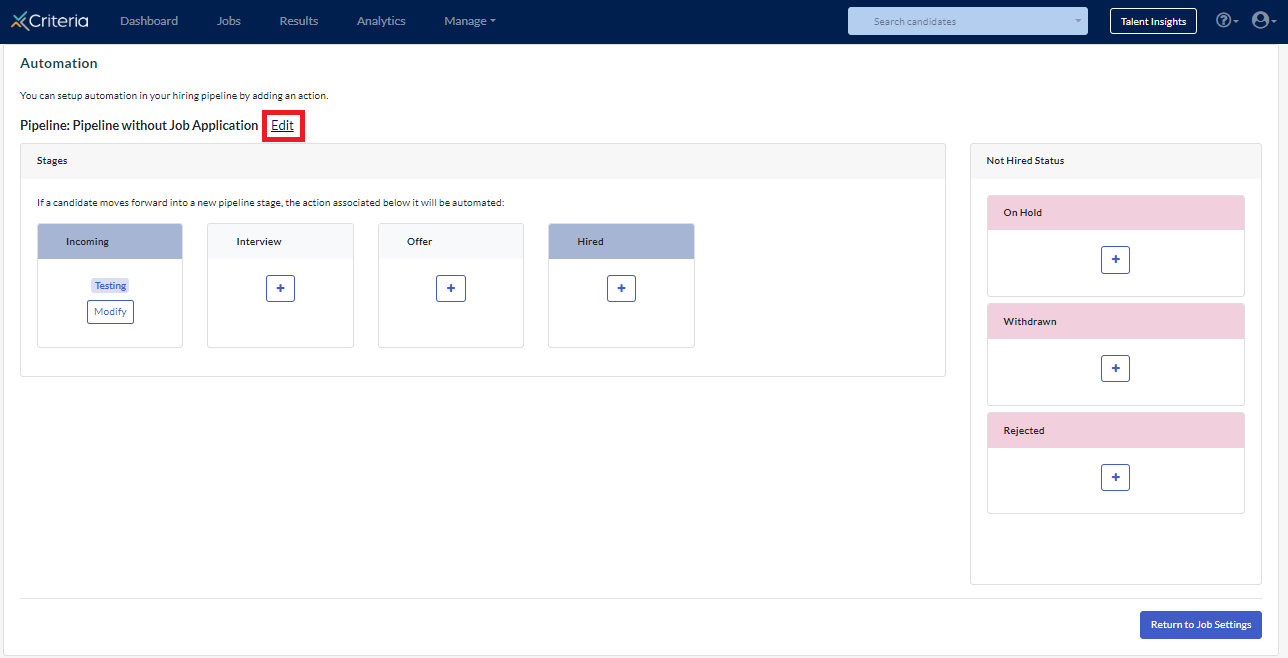
- Select the new pipeline to use for the job, then click Save.
- Add any automation steps required, then click Return to Job Settings.
