Create a Report

Updated by Amy Thomas

You can run two types of reports in the Reports section of your Criteria account:

  • Test data reports for candidates matching your desired parameters
  • Aggregate reports for a summary of your usage of assessments and structured interviews in Criteria.

The data visible in the reports will be limited to the results that you have access to. That is, you will only be able to run reports for jobs that you created or jobs that have been shared with you. If you have admin access for your Criteria account, you can see reporting data for all jobs.

Video walkthrough

Click to play this short video that steps through generating reports in the Criteria platform.

Create a Test Data Report

  1. Click Manage in the top navigation bar, then click Reports.
  2. Click the Create Report button and select Test Data Report.
  3. Enter a name for your report. Add a description of the report, if desired.
  4. To set this report to periodically run automatically, select the required option from the dropdown list under Schedule Reports. For more information on scheduling reports, see below.
  5. Select the filters that you want to use. Filters you can use include date-range, test status, and label.
    1. For Date Range, the following parameters apply:
      1. If you select a date range, then any event where any test activity occurred during that time period will be included in the report. Examples include: candidates being invited to complete testing, candidates completing testing.
      2. The date fields will automatically populate the To date field to be one year ahead of the From date (or the From date field to be one year behind the To date field, depending on which one is selected first). To change the dates, click into the To and From fields and select the required dates. Click Clear Dates to clear the previously selected dates and start again.
      3. Last Month is the last full month, not the last 30 days. For example, if you run a report on 3 November for Last Month, it will include any test activity that occurred from 1 October to 31 October.
      4. Last Week runs from Sunday to Saturday. For example, if you run a report on Wednesday for Last Week, it will include any test activity that occurred from the Sunday before last to last Saturday.
    2. If the Date filter and Test Status filter are used, the report will only include test activity for the requested status if that is the active status as of today for the date selected. For example, if you filter the report to "Invited" candidates for "Yesterday", a candidate that was invited yesterday but has completed testing today will not be included in the report. This is because their current status is "Completed", even though they were at "Invited" status yesterday.
      1. In other words, the report does not check what the candidates' status was during the time period selected, only what it is when the report is run.
      2. One way to work around this is to select a time period longer than "Yesterday" (e.g. from two days ago to several days in the future) and not use the Test Status filter. In the download spreadsheet you can then check all candidates who have a Started Date of yesterday's date.
  6. Select the columns that you want to appear in the report. Click the plus sign on the right of each column to add it to your report. You can drag and drop to rearrange the order of the columns.
    1. You can include assessment data, video interviewing data and your candidates' application form responses in this report.
  7. You can then choose to run, save, or save and run the report you have created.
  8. Select the jobs that you would like the report on and click Run.

Click here to view a sample report for a Graduate Program and Internship Program.

Create an Aggregate Report

Note: For candidate events that include both an Assessment Test Battery and a Video Interview, the entire event including both the Test Battery and the Video Interview must be completed in order to be counted towards usage.

Test Battery Usage: When a candidate completes an entire Test Battery, each Assessment within that Battery increases their usage count individually.

Video Interview Usage: When a candidate completes and submits their Video Interview, the usage count increases.

Live Interview Usage: When all Required Evaluators for any given candidate’s Live Interview submit their evaluations, the usage count increases.

  1. Click Manage in the top navigation bar, then click Reports.
  2. Click the Create Report button and select Aggregate Report.
  3. Enter a name for your report. Add a description of the report, if desired.
  4. To set this report to periodically run automatically, select the required option from the dropdown list under Schedule Reports. For more information on scheduling reports, see below.
  5. Choose a date range if you want to filter by date.
  6. You can then choose to run, save, or save and run the report you have created.
  7. Select the jobs that you would like the report on and click Run.

Scheduled reports

If you have an Enterprise or Professional subscription, you can set up a report to be automatically sent to you on a daily, weekly or monthly basis.

Set up the report as indicated above. In the Schedule Reports section, select the frequency for when you want the report to be sent to you. The report is run at 12am AEST on the date selected. Click Save Report and Run Now.

Note that selecting Run Report Without Saving will run a normal report and ignore the scheduling setting. The option to Save Reports is disabled for reports that have been scheduled. (This is because this option saves the report settings for later use and does not ask for the job list.)

Choose the job or jobs that the report is to be run on each time. Note that currently, the “All Jobs” and “Active Jobs” options are static: whatever jobs match the criteria at the time the report is created will be included in the report. (This will be updated with a future release.)

The scheduled report will only be sent to the user who created the report. If other users need access to this report, they can set up a duplicate report to be sent to them (by copying the report you created).

If you have included your candidates' application form responses in your report, we recommend scheduling the report, rather than running the report straight away. This is due to the complexity involved in generating reports containing large volumes of data.

Organising your reports

You can use the filters to the left of your list of reports to only view certain types of reports, such as only reports that have been scheduled or reports created by a particular user.

Scheduled reports are marked by the stopwatch icon to the left of the report name. The Scheduled column indicates how often the reports will be run.

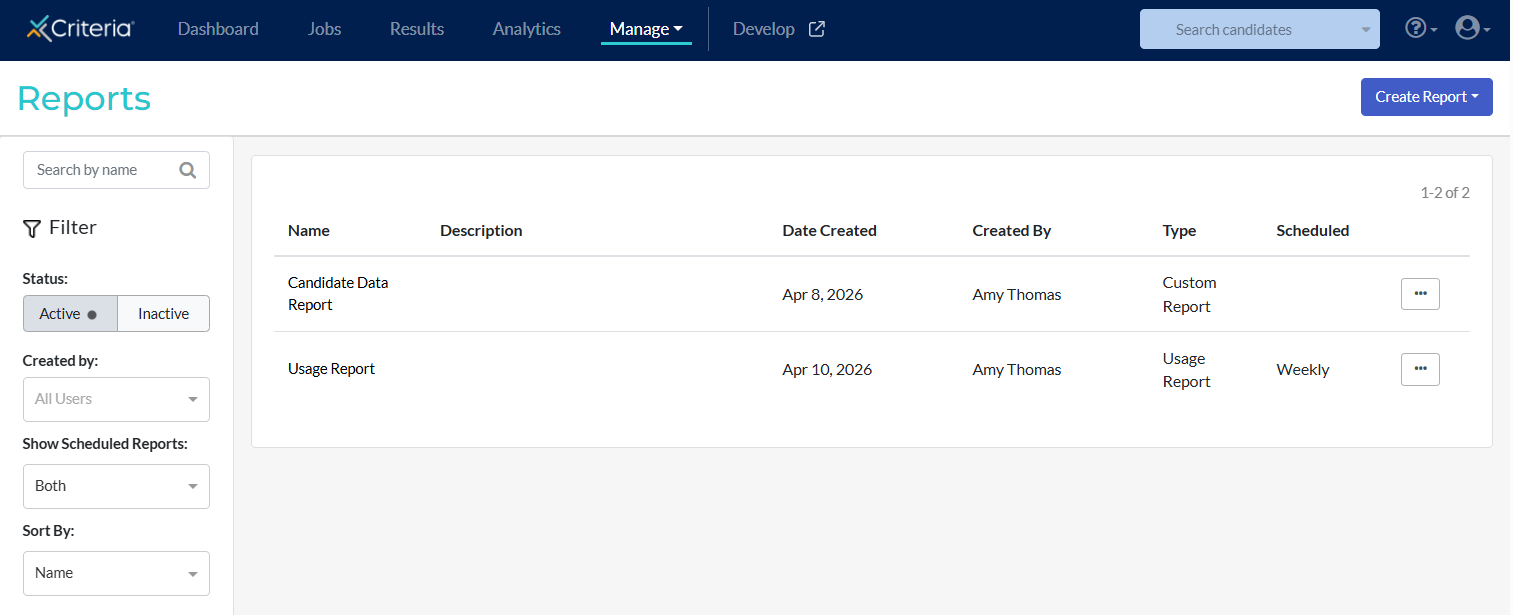
Click the … More Actions button to the right of each report to bring up further options.

  • Edit – you can change the setting and jobs for the report. This will impact all future scheduled reports when saved.
  • Copy – create a duplicate of the current report. Note that any restrictions around the jobs the report is for will be carried over to the new report. For example, if you do not have access to view one of the jobs the original report relates to, you will not be able to view the job using the copied report.
  • Run – this runs the job as if it were a normal, non-scheduled report and returns the data. This will not impact future scheduled reports.
  • Download – this downloads the job data as if it were a normal, non-scheduled report. This does not impact future scheduled reports.
  • Deactivate – you can delete the report if it is no longer required. Future scheduled reports won’t be sent.

Additional resources

Click here to download our Guide to Generating and Scheduling Reports.


How did we do?