Using Automation to Streamline Your Recruitment Process
 Updated
by
Amy Thomas
Updated
by
Amy Thomas
Within the Criteria platform, you can automate certain processes to save time and enable you to focus on other tasks.
- When your candidates have completed one stage of the recruitment process, automatically progress them to the next one without lifting a finger.
- Automatically notify your team when candidates progress to a new stage.
- Send an email to your team when a candidate's reports become available.
- Notify your candidates via email when they progress to the next stage in the recruitment process.
By setting up some simple rules you can automatically progress candidates through the application process. There’s a little more work required to set up automations, but once you have the foundations in place, you’ll save yourself and your team significant amounts of time.
Application form
If you’re collecting applications for a job using the Criteria platform, you can create automations that place candidates who do or don’t meet the role requirements into specific pipeline stages.
Before adding automation rules to the application form in your job, you’ll need to create some qualification or disqualification filters. These can only be created once your application form has been set up.
A qualification filter will screen in candidates and will automatically move those who meet the requirements to the next stage in the pipeline. For example, you want to automatically progress candidates who have a required qualification.
A disqualification filter will screen out candidates and will automatically move those who are disqualified to a Not Hired pipeline stage. For example, you want to automatically disqualify candidates who aren’t eligible to work in your country.
Note that you can add either qualification or disqualification filters to a job. You cannot have both set up in your automated pipeline simultaneously. (If a candidate triggered both the qualification and disqualification filters, the system will not know which to prioritise and therefore would not know which action to take for the candidate.)
You can re-use job applications and filters for future jobs.
Assessments
You can automatically send your candidates invitations to complete assessments when they are progressed to that step in the recruitment process. If they meet the score range you have selected for one or more assessments, you can automatically progress them to the next stage in your pipeline.
You will need to select a score range for the assessment (or assessments) in your job. This step may also be completed while setting up your pipeline automation. You can use a Criteria score range or create a custom one based on data from your organisation.
Video interview
You can automatically send your candidates invitations to complete a video interview when they are progressed to that step in the recruitment process.
If they complete the interview or meet the score threshold you have set, you can automatically progress them to the next stage in your pipeline. Please note that this option is not available if you are using assessments and video interview in the same pipeline stage.
Before adding this to your pipeline, you will need to create the video interview template, which contains all the questions your candidates will respond to.
Pipeline and job setup
The Criteria platform includes two pipeline templates to help you get started, however you can create a custom pipeline to better suit your organisation's recruitment process. This will need to be set up and applied to your job, before any automation steps can be added.
Add automation rules to your job
On the Jobs screen, click More Actions to the right of your job and select Edit from the dropdown. If you have the job open, click the settings wheel in the top right corner.
In the Candidate Management section, click Edit for Pipelines and Automation.

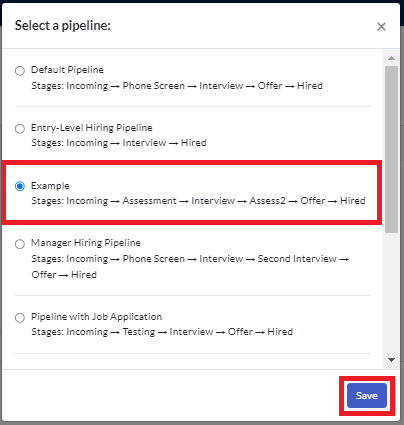
If your organisation's default pipeline is different from the one you will be using for this job, click Edit next to the pipeline to change this.
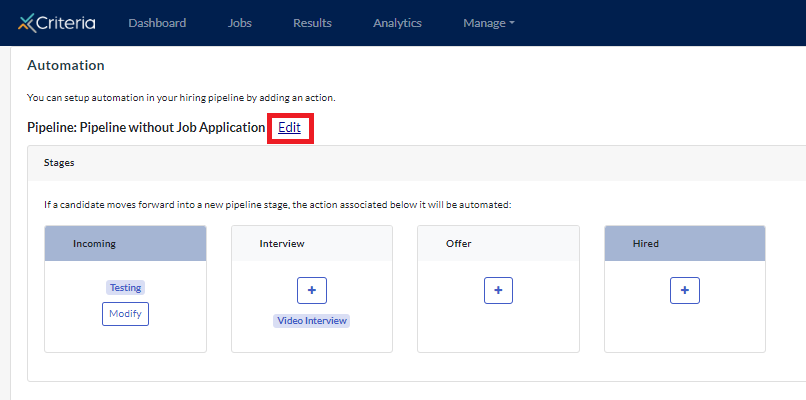
Select the correct pipeline stage and click Save.
You are now ready to add automations to your job.
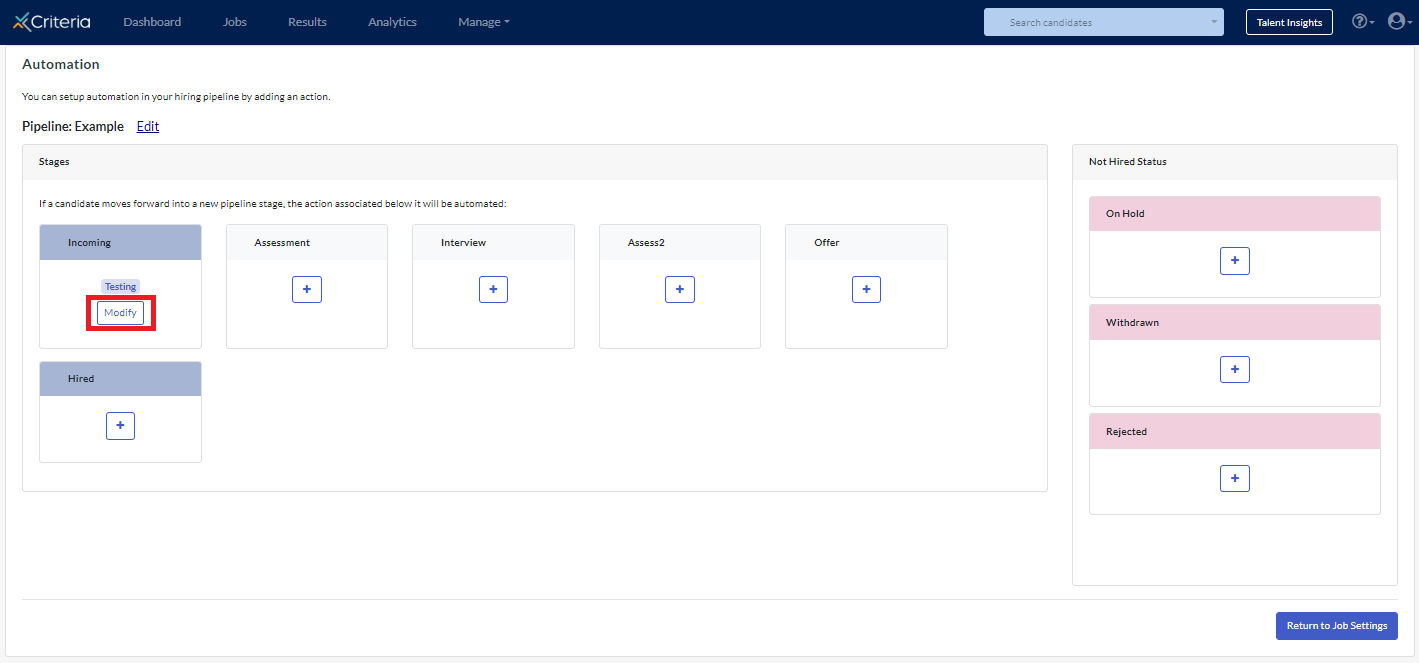
For our example job, we will be collecting applications from candidates, then progressing them to complete assessments, video interview and a second onsite assessment, before making our hiring decision.
Application form automation
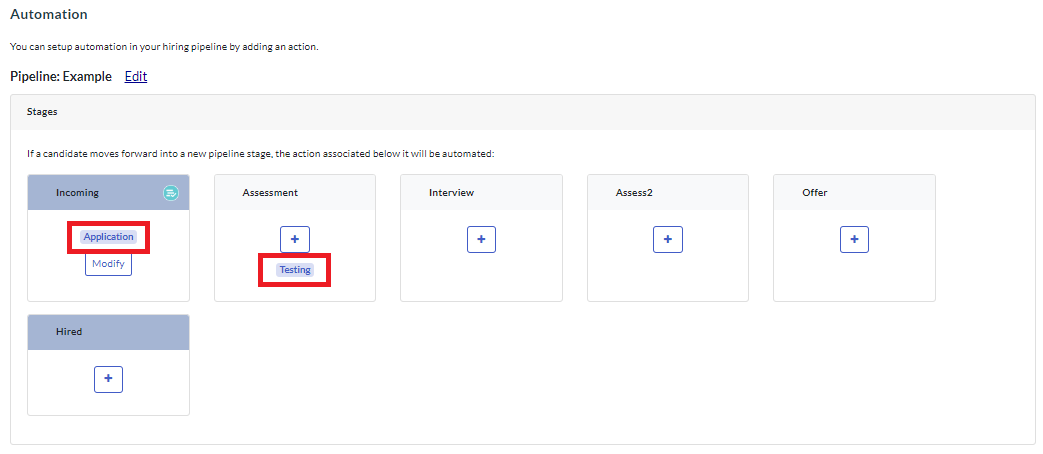
Click Modify in the Incoming stage. At the moment, it is showing Testing in this stage, but we will be moving that to the Assessment stage.
In the modal, click Application. Select the stage that the test battery is to be moved to. Click Add a Rule.
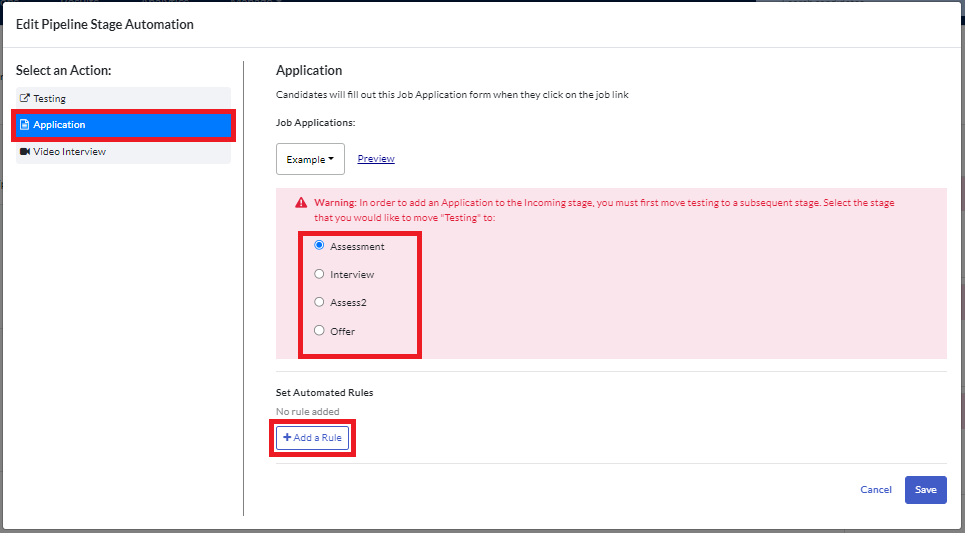
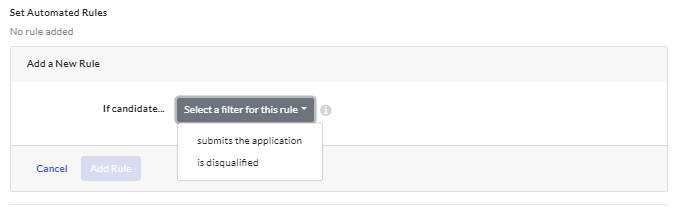
Click the dropdown list under Select a filter for this rule. Your options here will depend on whether you created qualification or disqualification rules for the application form. Select the option you want to use. For our example job, we will be creating two rules:
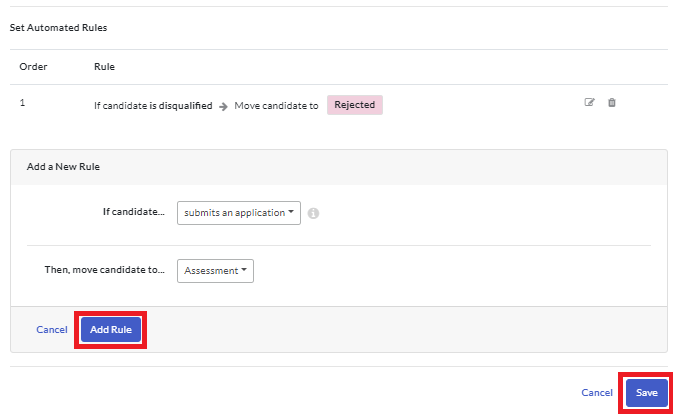
- If the candidate is disqualified, based on how they answer the application form question, they will automatically be moved to the Rejected pipeline stage.
- All other candidates who are not disqualified, will be moved to the next stage in the recruitment process.
If you are using qualification filters, you can set a rule to automatically move anyone who meets the criteria to the next stage.
Click Add Rule after setting the parameters for each rule. Click Save once you have added all the rules.
Assessment automation
In our example job, the Incoming stage now shows Application and the Assessment stage now shows Testing. You can click on Application or on Testing to make changes to the setup for these stages.
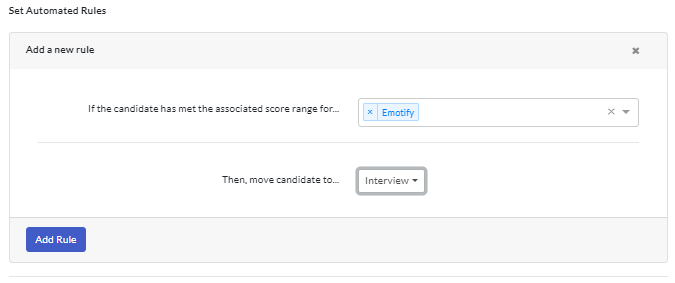
Click on Testing. Scroll down to the bottom of the modal and click Add a Rule.
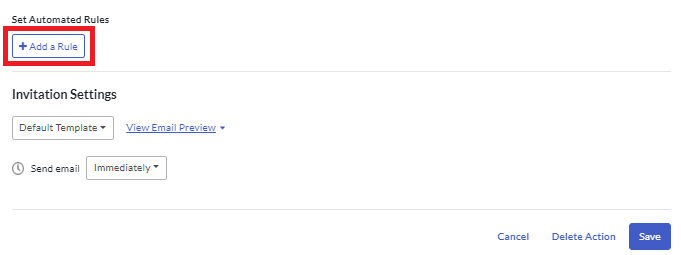
Select the assessment you wish to add a rule for, then select the pipeline stage the candidates will be moved to. Click Add Rule.
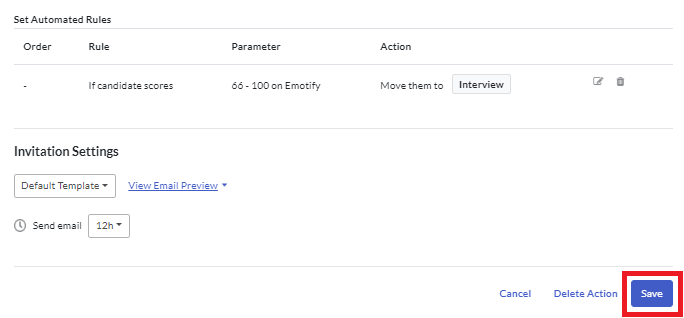
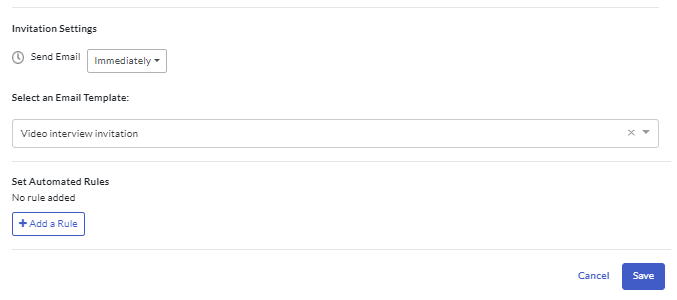
In Invitation Settings, you can select a different invitation email template from the default set for the job. You can also select when to send the invitation email to your candidates. You might choose to delay the email to give the impression that someone has reviewed the candidate's application and chosen to progress them to the next step in the recruitment process.
Click Save.
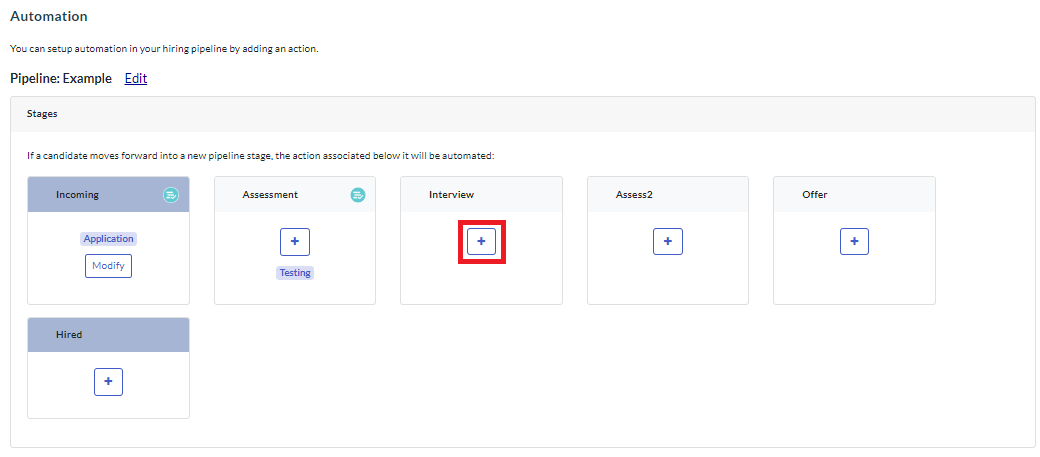
Video interview automation
To add automation to the video interviewing stage in the pipeline, click + in the relevant pipeline stage.
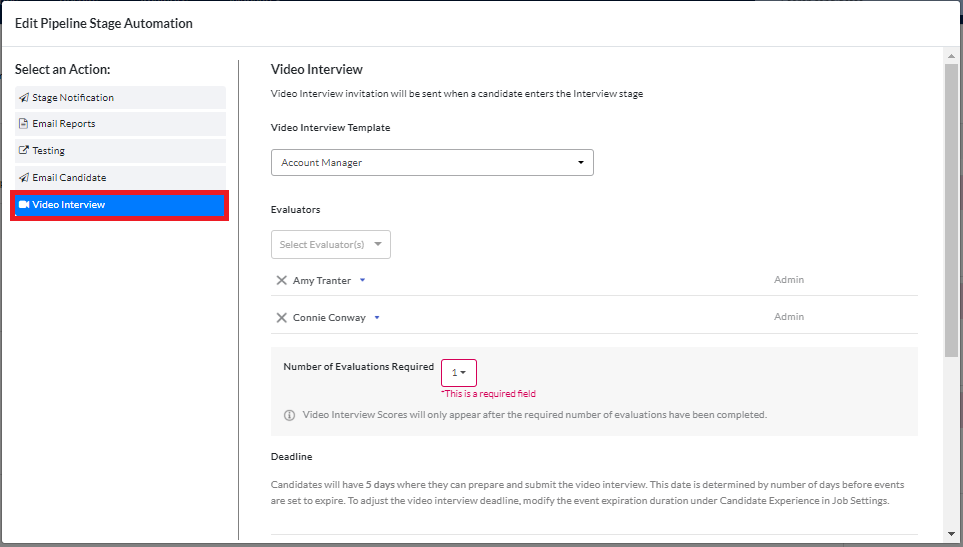
Click Video Interview on the left side of the modal and fill out the details for the video interview you are using.
Scroll to the bottom of the modal. Here you can select a different email template from the default set for the job and set a delay on the invitation email being sent. If you are using assessments and video interview in the same job, we recommend setting a different invitation email here, as the requirements for each of these tasks are different. You may also have different instructions or information you wish to provide to your candidates for this step in the recruitment process.
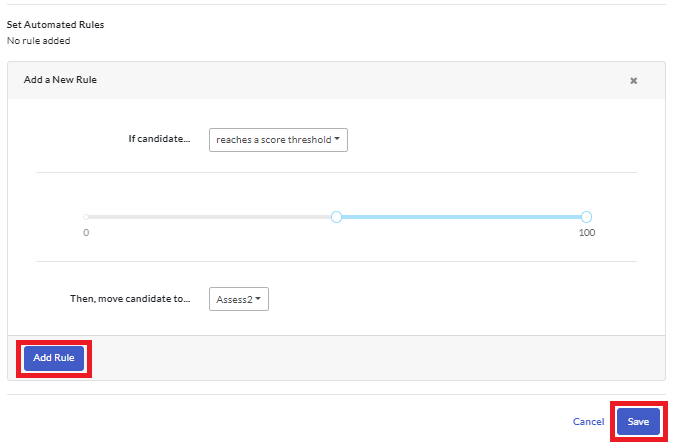
Click Add a Rule. You can select to move candidates if they reach a score threshold or if they complete the interview. For our example job, we will be inviting candidates to an onsite assessment stage if our evaluators score their interview responses at least 50.
Click Add Rule, then click Save.
Other automations
In our example job, the Assess2 stage is where candidates who will be invited to our onsite assessment are placed. We want to:
- Be notified as soon as candidates reach this stage.
- Invite our candidates to the onsite assessment session.
- Email the candidate reports to the hiring manager.
Stage notification
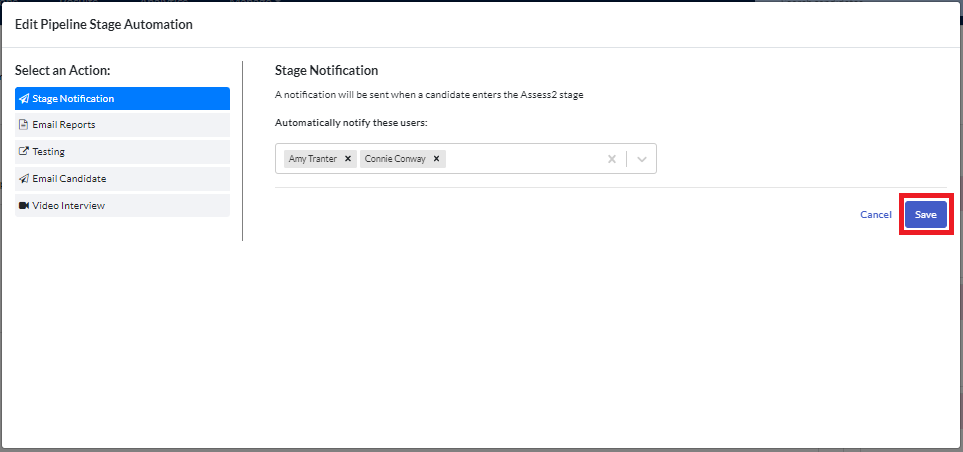
Click + for the pipeline stage, then click Stage Notification.
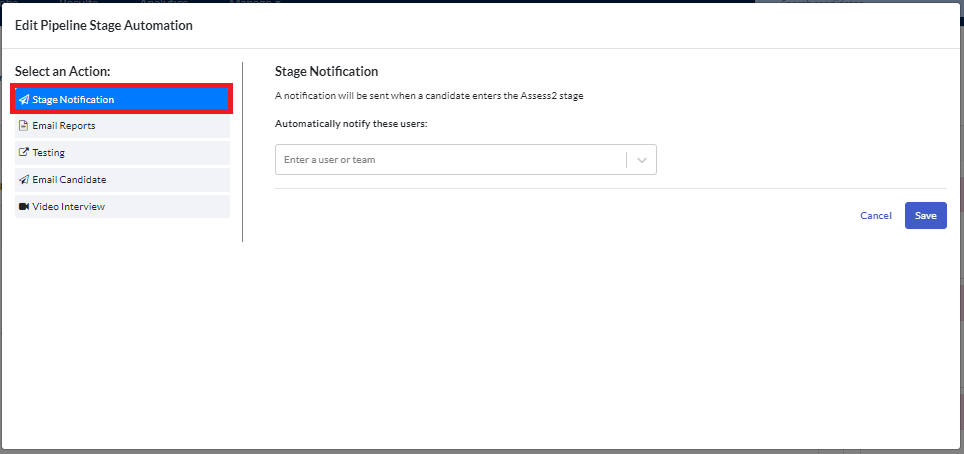
One at a time, select each user or team who are to be sent an email when a candidate is added to this pipeline stage. Click Save.
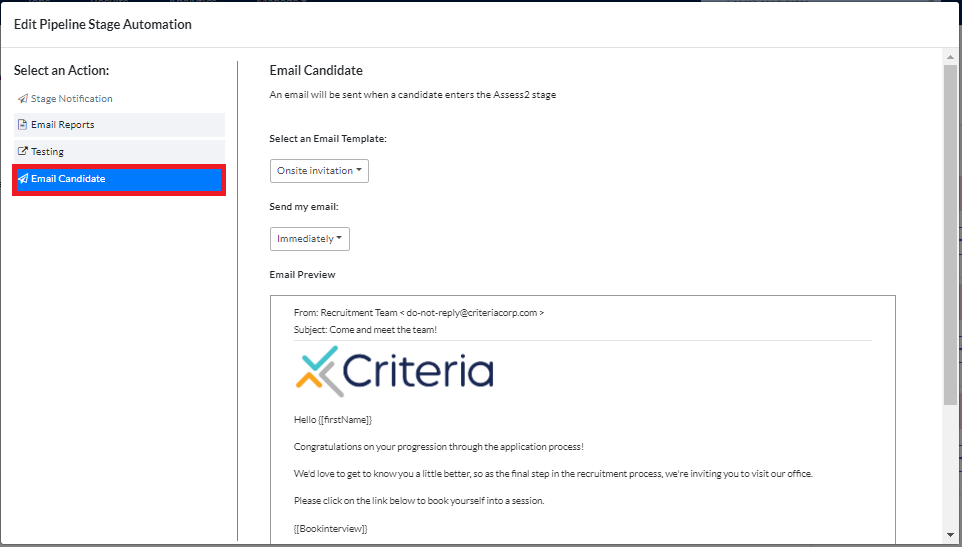
Email candidate
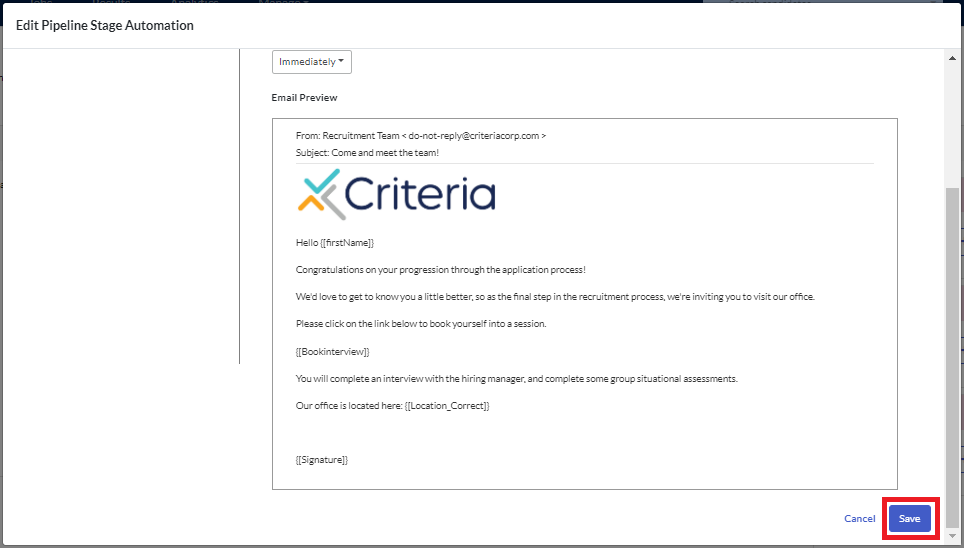
Click + for the pipeline stage again, then click Email Candidate. Select the email template to be sent to your candidates and whether there is to be a delay in sending it. Note: as this email is not an invitation to complete an event in the Criteria system, the email template does not need to contain the Candidate Testing Link or General Testing Center Link and Event ID email variables.
Scroll down to the bottom of the modal and click Save.
Email reports
Click + for the pipeline stage again, then click Email Reports. One by one, select the users and / or teams who are to be sent the reports. Under Reports to Send tick next to which reports are to be sent.
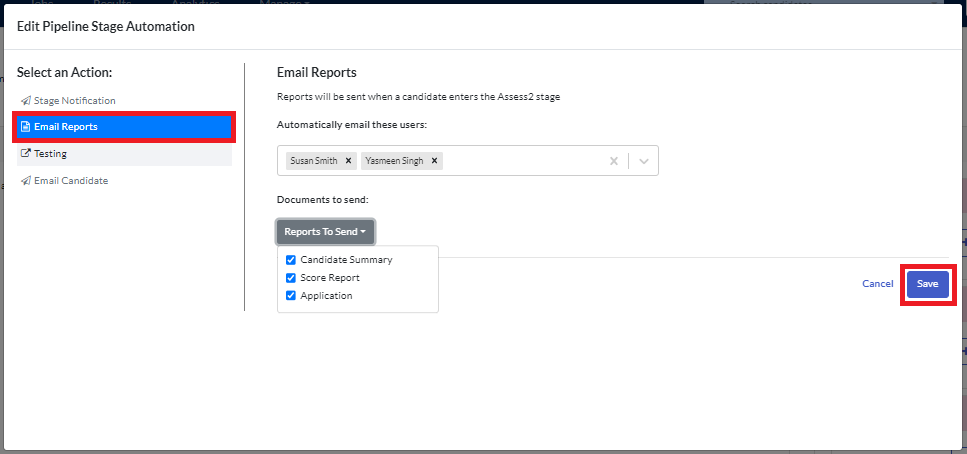
Click Save.
Return to job
Once you have added all the automations you want to your pipeline, click Return to Job Settings to be redirected back to the job settings screen.
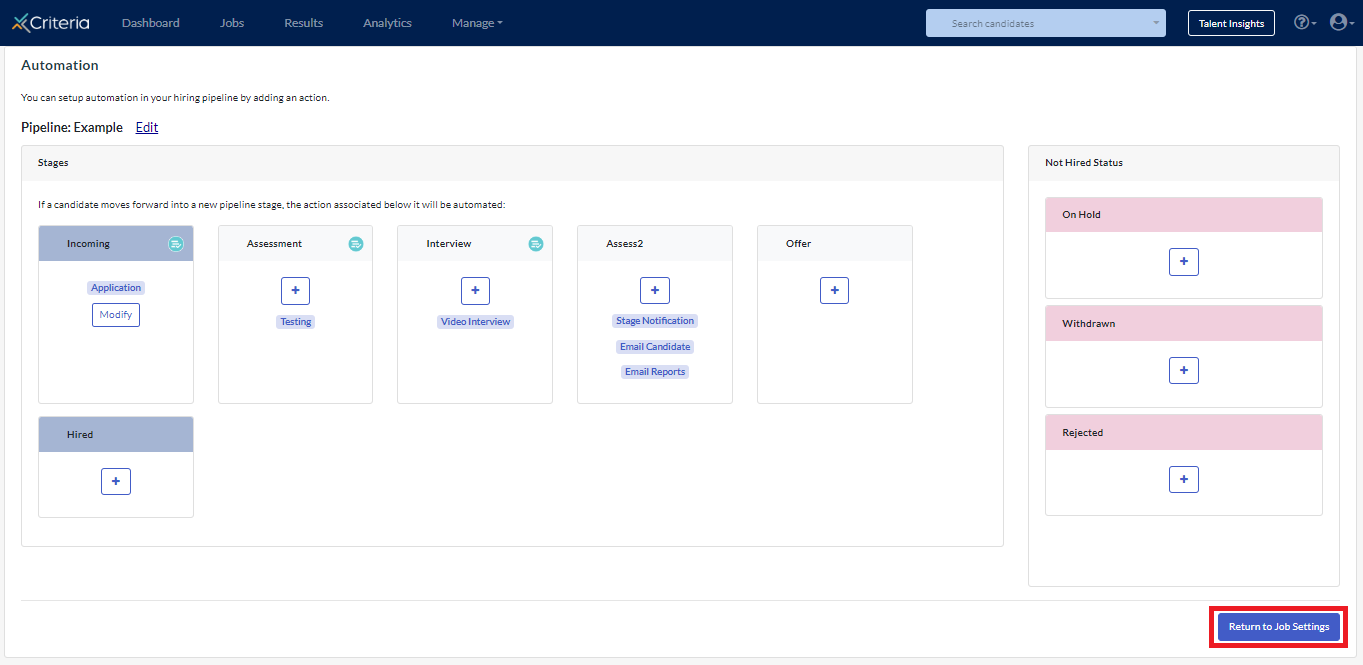
In the job, you will now see a new icon in each stage to indicate that an automation rule has been applied.

Additional resources
Click here to download a pdf version of our Guide to Pipeline Automation.