Rippling Integration Guide
 Updated
by
Integrations Team
Updated
by
Integrations Team

Setting Up Your Integration
- Contact your Criteria Customer Success Manager (CSM) and advise you would like to integrate with Rippling
- You will need to have access to Rippling Recruiting and Workflow Studio prior to activating the integration.
- Criteria will provide you with the URL, Custom Header Value and Custom Integration Package Code(s).
- You will use the Workflow Studio to set up and enable the Criteria Integration, using the information below and the details provided by Criteria.
- Follow the Activating the Integration process below to get started.
- We encourage all customers to put through a few test candidates to ensure the integration is working as intended, before going live.
Activating the Integration
Make sure you have access to Rippling Recruiting. If you don't see it in your Rippling account, you can add it from the Rippling App Store.
Check that you can use the "Call a public API" action in Workflow Studio. To use this, your Rippling account needs to have the Rippling Platform Pro plan or the Unlimited Workflow Add-on. If you're not sure whether you have this access, or cannot access the "Call a public API" action in Workflow Studio, reach out to your Rippling Account Manager or Technical Account Manager for help.
Summary of the activation process:
- Determine which Rippling workflow status(es) will be used to trigger Criteria Testing. Create new status values as required.
- Set up your Criteria Custom Integration Package(s), one for each Rippling status that will trigger Criteria testing.
- Set up workflow rules in Workflow Studio using the details provided by Criteria to automate the invitation in Criteria when a candidate is moved into a status.
Determine Rippling Status(es) to trigger testing
This integration may invite all candidates to complete Criteria testing as soon as they apply. In this case, no additional setup is required in Rippling.
Alternatively, you may choose to trigger Criteria testing later in the candidate workflow. If so, determine which workflow stage should trigger this testing. Create additional steps in your workflow in Rippling as per your requirements.
When you get to the Workflow Studio step you will need to already have this information determined and any new status values already created.
Setting up your Criteria Custom Integration Packages
The Custom Integration Packages feature in Criteria will be utilized by this integration. There will be 1 custom package for each Rippling workflow stage that triggers Criteria testing. When Rippling tells Criteria that a candidate is to be invited, the custom integration package configuration will be used to determine what testing the candidate is to complete. You will need to maintain your custom integration packages with a mapping for each Rippling Requisition that is to use Criteria testing.
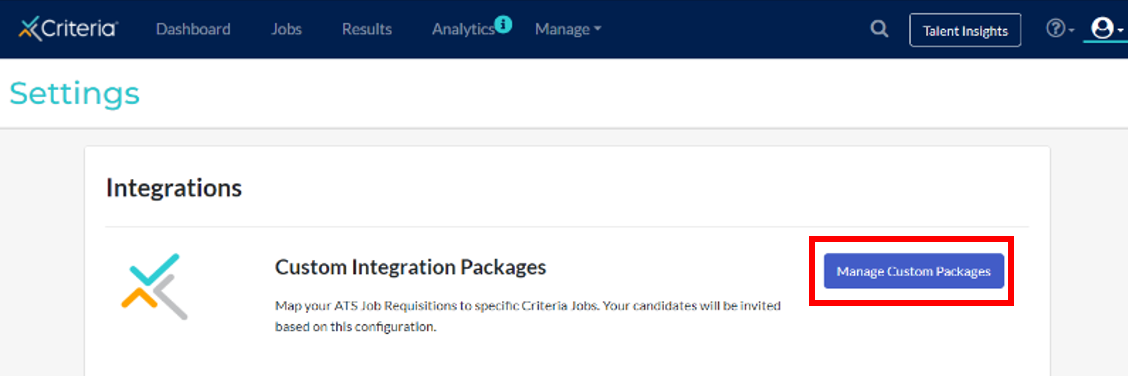
In Criteria, click on your avatar at the top right, and then select the Integrations menu. Click Manage Custom Packages.
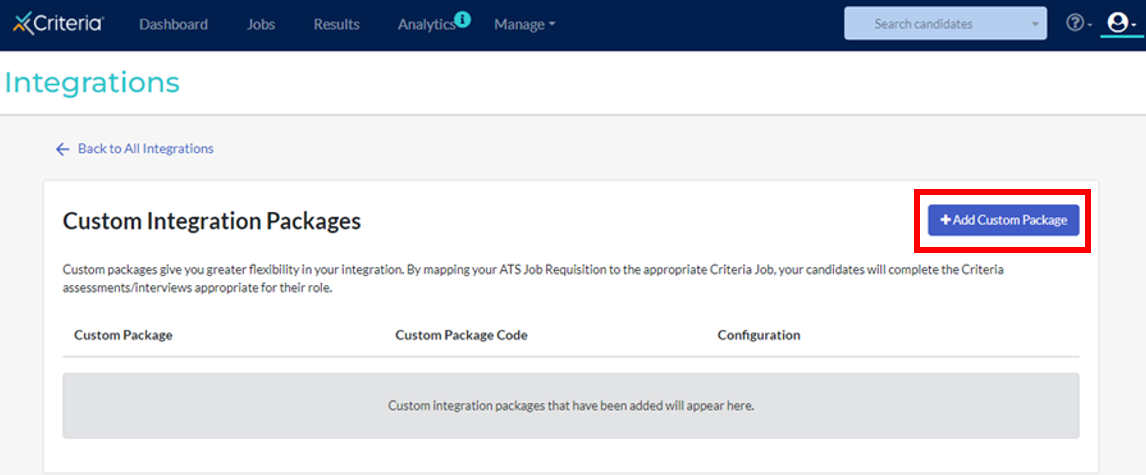
Click Add Custom Package to create a new Custom Package to use in Rippling.
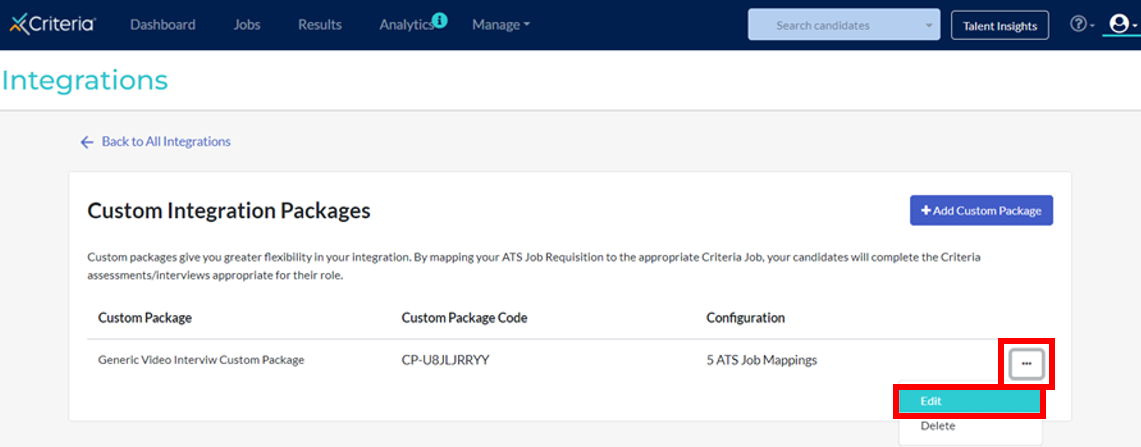
If you already have a Custom Package, click the 3-dots and choose Edit to edit that package.
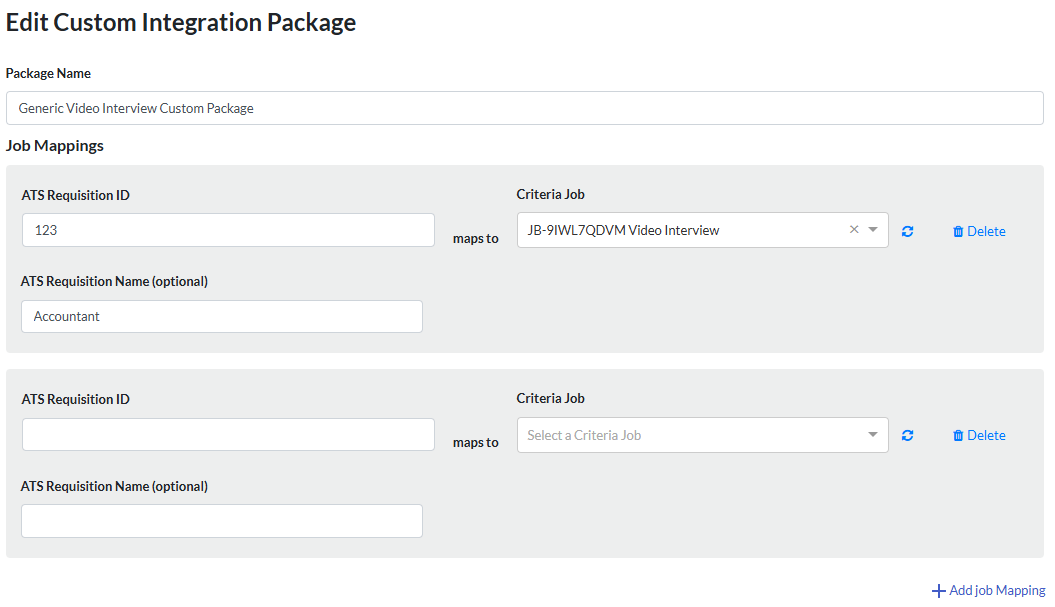
Give your package a name. It is recommended to use the workflow stage Name in the name field to help distinguish which status uses this Custom Integration Package. In the Job Mappings section, copy and paste in the Rippling Requisition ID and Name. Then choose the corresponding Criteria Job that the candidates should be invited to when they are invited from that Rippling requisition. When selecting a Criteria Job, type the job name into the drop-down list to filter the list to easily select the item you are looking for.
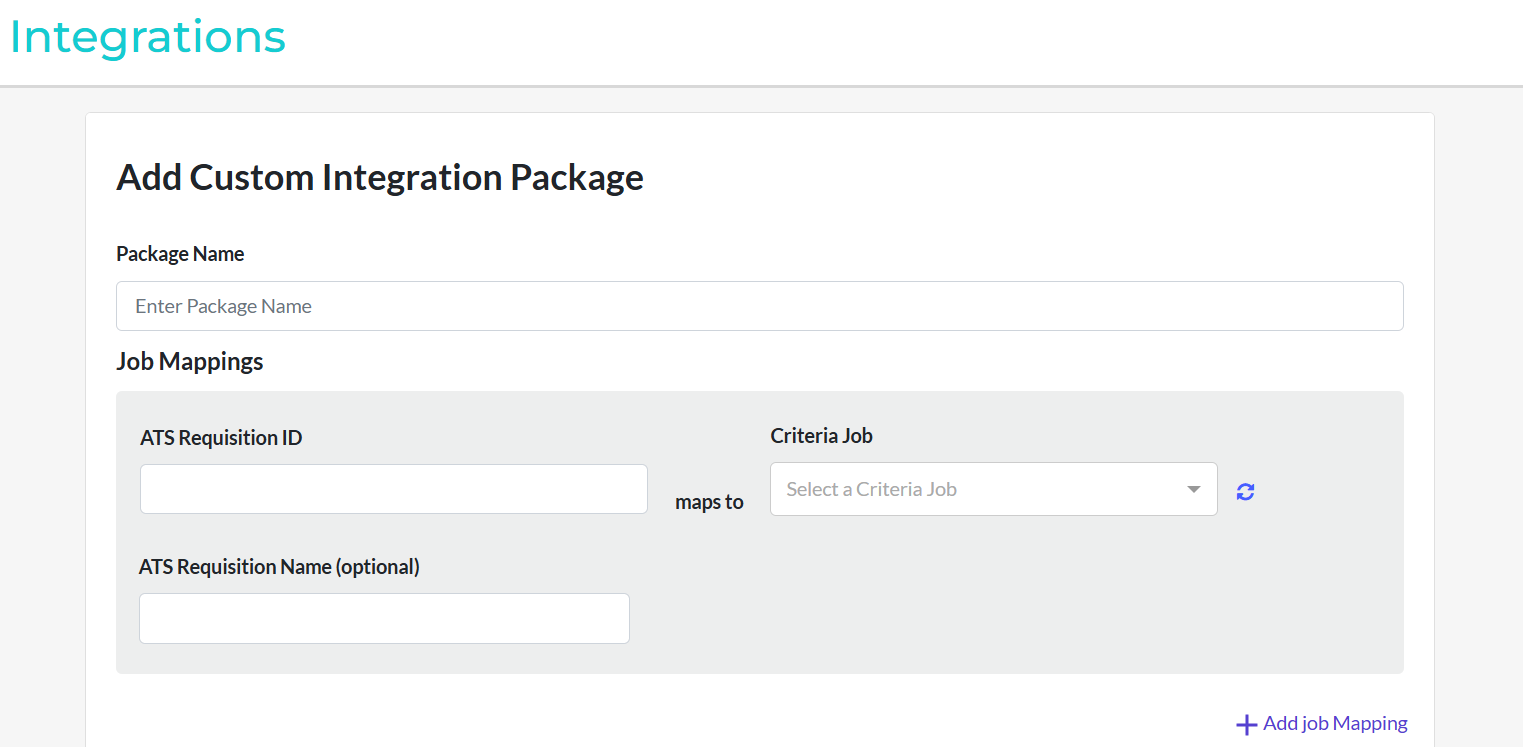
Use the Add Job Mapping link to add additional rows to the Job Mappings list.
In the Package Settings you have a few configuration options available for this Custom Package.
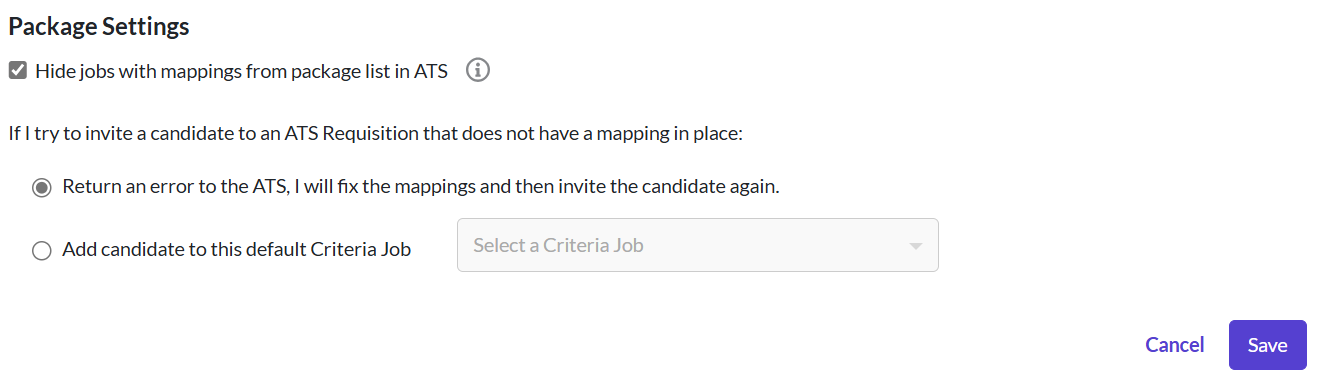
The Hide jobs with mappings from package list in ATS box (on by default) is not applicable to this integration as there is no live-pull of packages from Criteria into Rippling. Leave this setting as-is.
Error Handling when mapping is missing
When you create a new Requisition in Rippling, you will need to remember to update your Custom Package in Criteria to add a mapping for the new role. We understand that this step may be overlooked sometimes so we've included some options to allow you to choose what happens in this situation. Use the If I try to invite a candidate to an ATS Requisition that does not have a mapping in place options to choose what you would like to happen in this situation.
- Return an error to the ATS - use this option if you are happy to manually add the mapping to the Custom Package and then attempt the invitation again via Rippling.
- Add candidate to this default Criteria Job - if you only want to customize the Criteria Job used for some roles, and for all other roles you have a default Criteria Job to use, choose this option and select the default Criteria Job to use when there is no specific mapping for a Rippling Job.
e.g. you may want to always assess candidates for accounting roles using a set group of Assessments, however, if it's a Team Leader Accounting role you may want to use a different Criteria Job that has a slightly different configuration of Assessments. You would just need to add a Job Mapping for the Team Leader roles.
Click Save when your selections are complete. You can edit your package via the Criteria platform at any time.
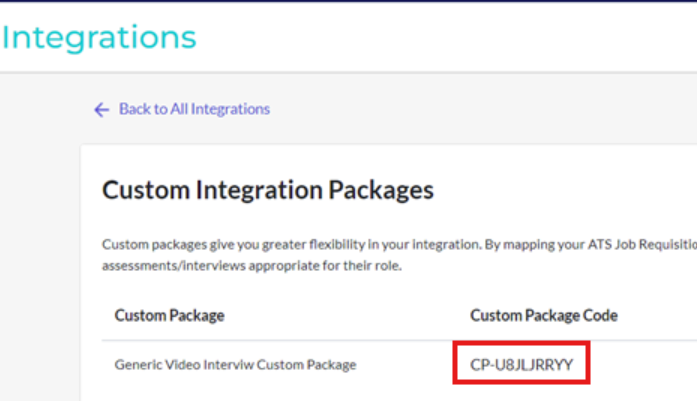
Once a Custom Package has been created, you can add it to Rippling by copying the Custom Package Name and Custom Package Code from Criteria and using these as the package name and ID in Rippling.
Setup the workflow in Workflow Studio
Pre-requisites:
- You have determined which status(es) in the candidate workflow will trigger Criteria testing and these status(es) have been configured in Rippling.
- You have received the URL, Custom Header Value and Package ID from Criteria
You will create a Workflow rule for each candidate workflow status that will trigger Criteria testing.
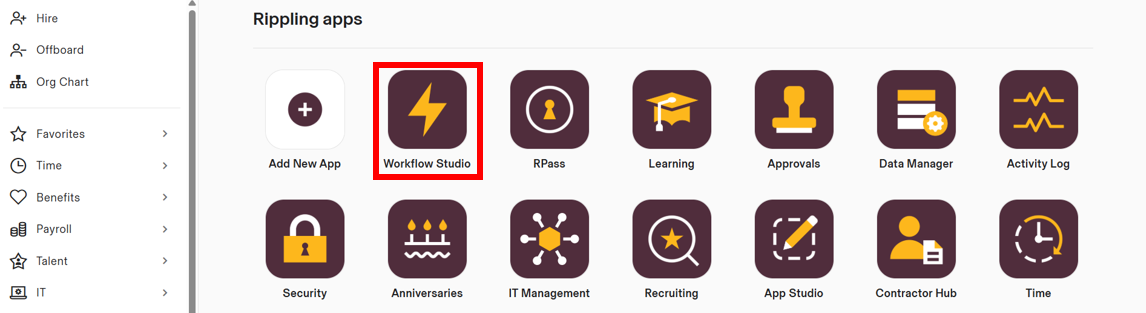
Navigate to Workflow Studio within Rippling apps.
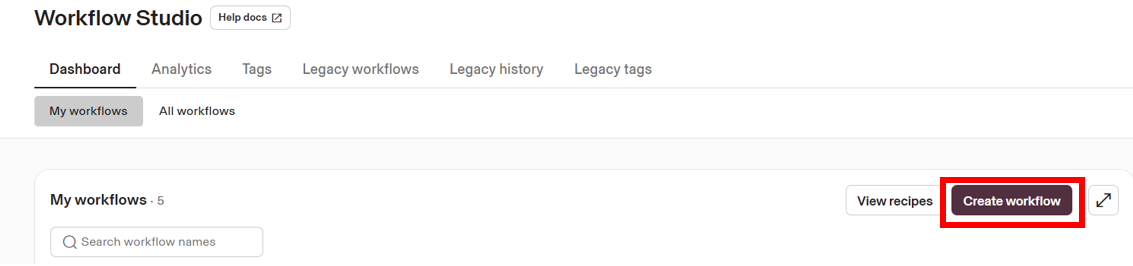
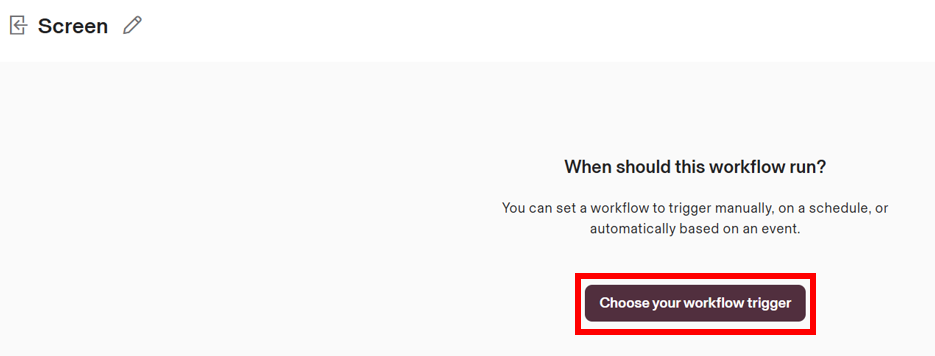
Select Create workflow.
Select Choose your workflow trigger.
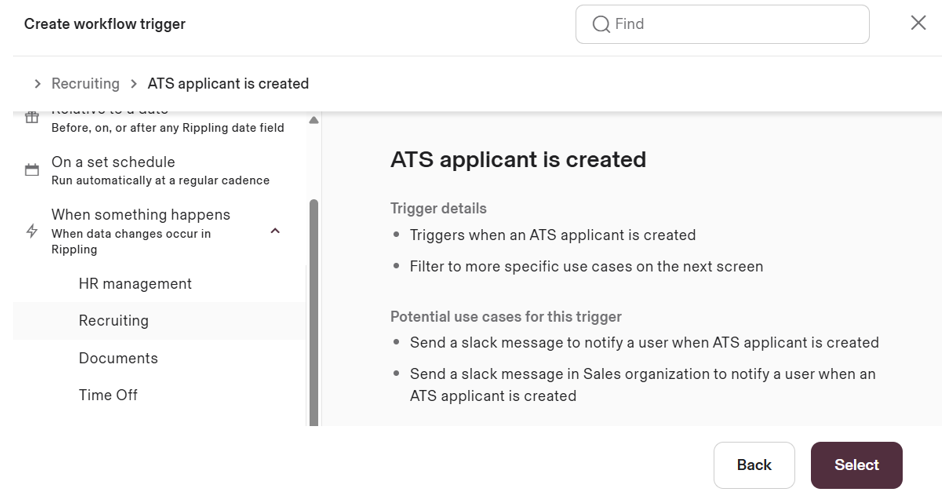
Navigate to When something happens, then Recruiting. Next, you will need to select the Rippling event that will trigger Criteria Testing.
- If you would like to trigger Criteria Testing when a candidate is created, select ATS applicant is created. This will allow you to automatically assess every candidate that applies. Click Select.
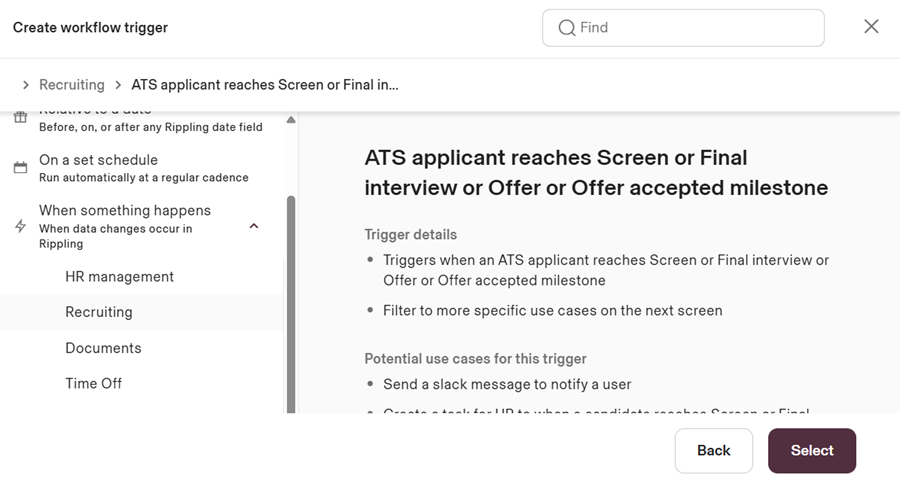
- If you would like to trigger Criteria Testing later in the workflow when a candidate is moved into a specific stage, select ATS applicant reaches Screen or Final interview or Offer or Offer accepted milestone. Click Select.
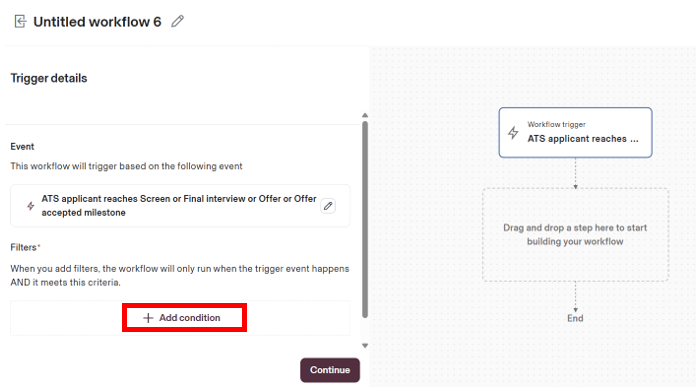
If you chose ATS applicant reaches Screen or Final interview or Offer or Offer accepted milestone, you must also apply a filter to specify the status which should trigger the Criteria testing. Once you are in the workflow edit screen, click on the Workflow trigger step in the right section of the page, then in the left panel, click + Add Condition in the Filters section.
In the Condition builder popup, search for Stage name in the find bar.
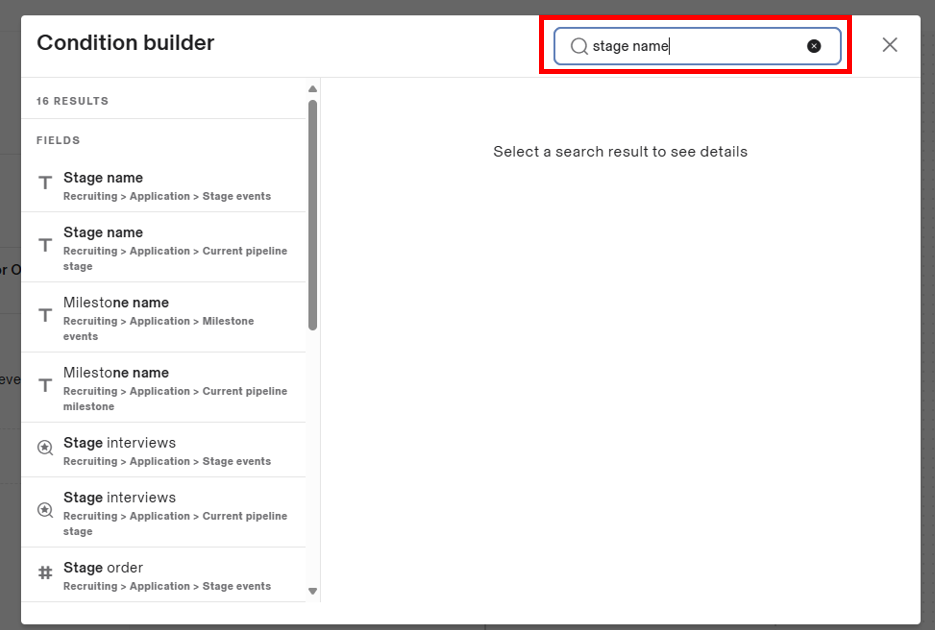
There will be multiple entries returned in the left panel, choose the one that has the sub-heading Recruiting > Application > Current pipeline stage.
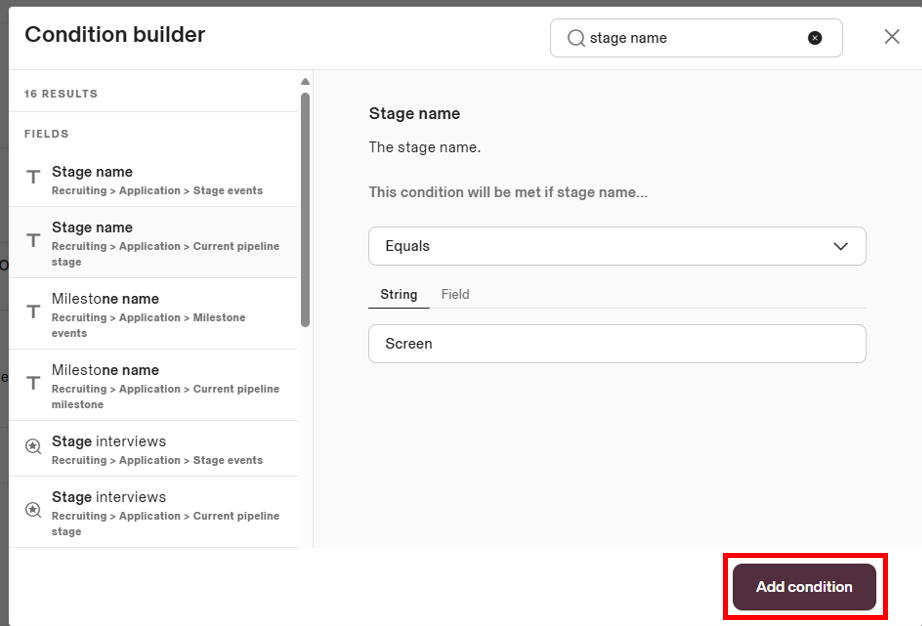
Leave the first drop-down option as Equals and then in the next field, type in the name of the stage that you wish to trigger Criteria testing from. Ensure that you type it exactly as it exists in the candidate workflow. In this example, we will use the stage called Screen. Click Add condition.
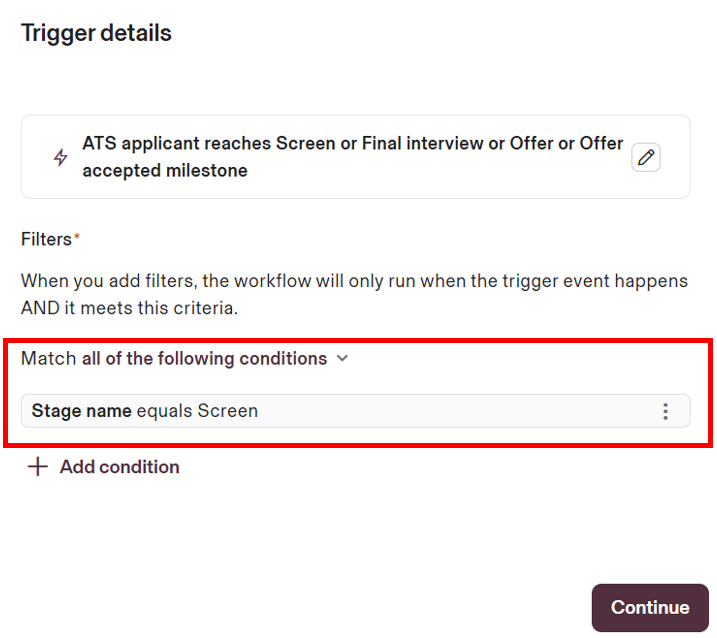
The Workflow trigger step should now have a filter applied for the stage name you entered.
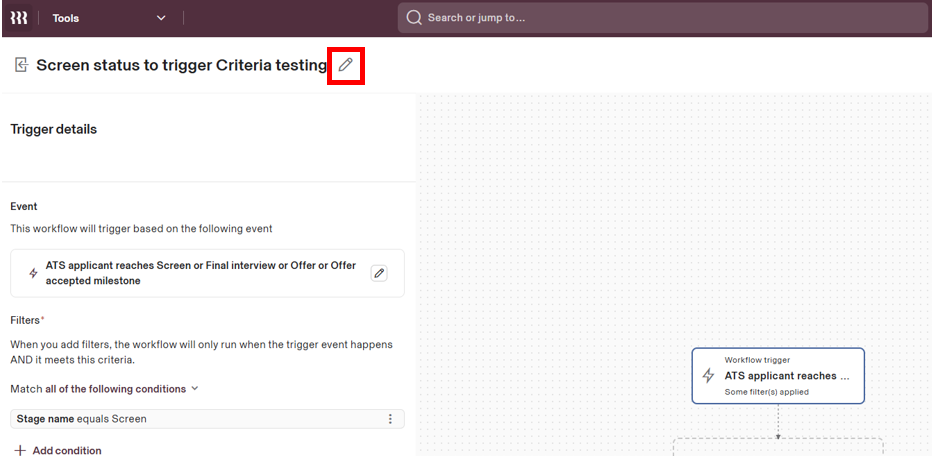
Use the pencil icon at the top of the screen to give this workflow a name, include the Stage name from the filter e.g. Screen status to trigger Criteria testing
Next, we will add a step into the workflow.
If you are still seeing the Trigger details in the left panel, click in a blank spot in the right panel to clear this so you can see the Add a step left panel.
Locate Call a public API from the Actions list.
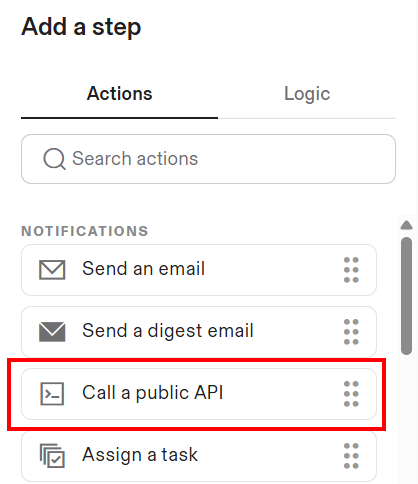
If Call a public API cannot be accessed, confirm you are on the Rippling Platform plan or the Unlimited Workflow Add-on.
Drag that item to the right panel into the box with a dotted line that says Drag and drop a step here to start building your workflow.
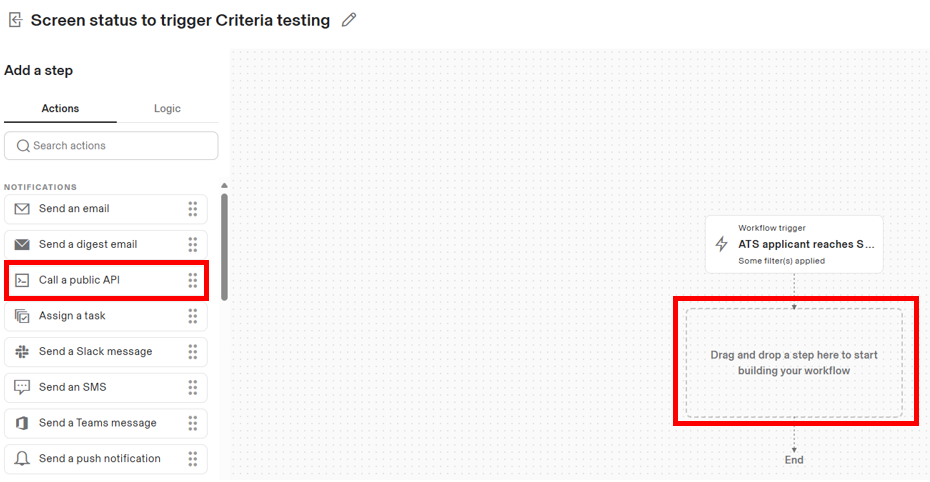
Your workflow should now have 1 step.
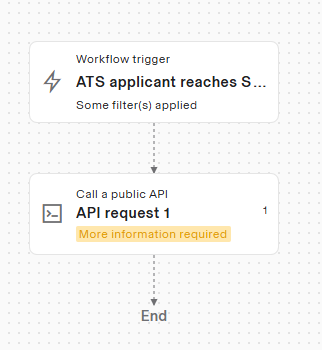
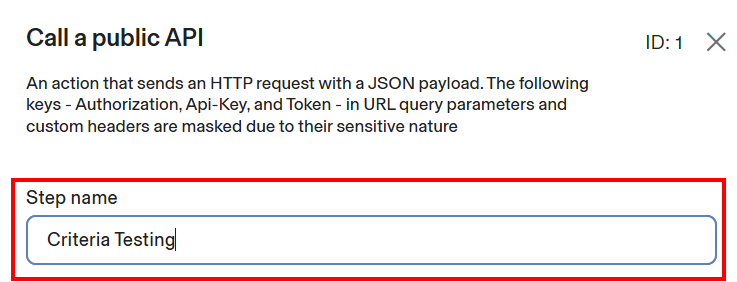
Click on this new step in the right panel and the Call a public API panel will appear on the left.
Under Step name, write the name of what you would like the step to be called. E.g. Trigger Criteria Testing
The URL will should always be the following:
- Criteria Corp (North America) customers - https://integrations.criteriacorp.com/api/v1/order
- Criteria Australia customers - https://integrations-au.criteriacorp.com/api/v1/order
Select POST from the HTTP method drop down.
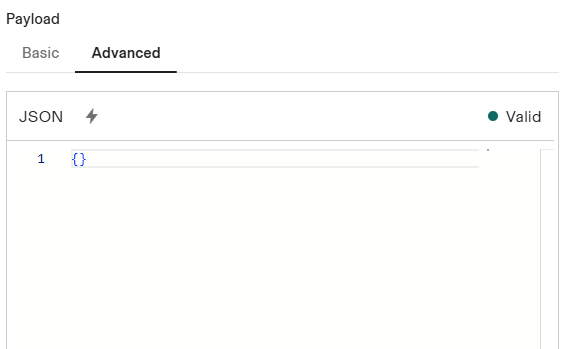
In the Payload section, select the Advanced tab, a box will appear with curly brackets in it. This next step requires you to add some code into the box, don't worry, we've provided the code below and you just need to copy it and then edit one section to have your custom integration package ID value.
If you are using SMS invitations and reminders in Criteria, or you may do so in the future, copy this block of text. This text includes the candidate mobile number which will be passed to Criteria when the candidate is ready to be invited. Note: SMS invitations/reminders will not be sent unless SMS functionality is also enabled in your Criteria account.
{
    "orderId": {
        "value": "{{{{trigger|base_object|job_req.requisition_id}}}}^{{{{trigger|base_object|current_stage.name}}}}^{{{{trigger|base_object|applied_at}}}}-{{{{trigger|base_object|candidate_v2.email}}}}"
    },
    "packageId": {
        "value": "CP-XXXX"
    },
    "requisitionId": {
        "value": "{{{{trigger|base_object|job_req.requisition_id}}}}"
    },
    "candidate": {
        "last": "{{{{trigger|base_object|candidate_v2.name.last}}}}",
        "first": "{{{{trigger|base_object|candidate_v2.name.first}}}}",
        "email": "{{{{trigger|base_object|candidate_v2.email}}}}",
        "mobile": "{{{{trigger|base_object|candidate_v2.phone_number_v2.country_code}}}} {{{{trigger|base_object|candidate_v2.phone_number_v2.national_number}}}}"
    },
    "sendCandidateEmail": true,
    "smsConsent": true
}
If you aren't using SMS in Criteria or do not wish to provide the candidate mobile number to Criteria, copy this block of text.
{
    "orderId": {
        "value": "{{{{trigger|base_object|job_req.requisition_id}}}}^{{{{trigger|base_object|current_stage.name}}}}^{{{{trigger|base_object|applied_at}}}}-{{{{trigger|base_object|candidate_v2.email}}}}"
    },
    "packageId": {
        "value": "CP-XXXX"
    },
    "requisitionId": {
        "value": "{{{{trigger|base_object|job_req.requisition_id}}}}"
    },
    "candidate": {
        "last": "{{{{trigger|base_object|candidate_v2.name.last}}}}",
        "first": "{{{{trigger|base_object|candidate_v2.name.first}}}}",
        "email": "{{{{trigger|base_object|candidate_v2.email}}}}"
    },
    "sendCandidateEmail": true
}
Before you paste this text into Rippling, first, delete the 2 curly brackets from the box in Rippling, we want the box to only contain the text you copy from this guide.
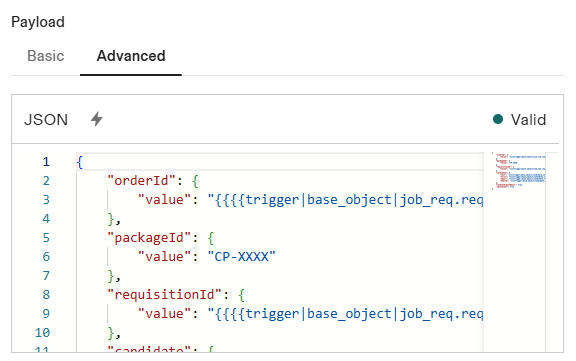
Then, copy the block of text from above - either including or excluding mobile number - and paste it into the box in the Advanced Payload section in Rippling.
In Rippling, where you pasted the text, look at line 6, it will show "value": "CP-XXXX". This is a placeholder for your custom integration package. You need to edit this to contain your specific package ID value.
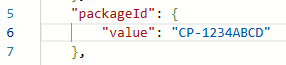
Edit line 6 to include your own custom integration package ID code. Criteria will have provided this to you. If your Code was CP-1234ABCD the updated line 6 would look like the following image. Make sure you keep the double-quotes around the code and there are not any extra spaces.
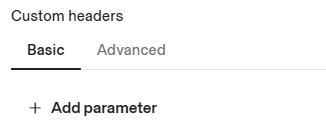
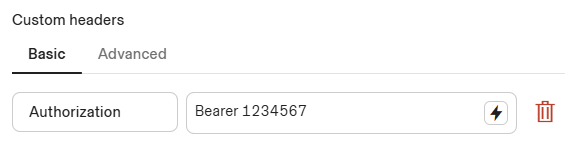
In the Custom headers section, we will stay on the Basic tab. Click + Add parameter.
Enter the Key as Authorization
Criteria will provide you with the exact Value to enter here. It will be the text Bearer followed by a space, followed by your Criteria API key e.g. Bearer 1234567
Within the Expected API response schema field, enter the following. Remove the brackets that already exist in the box in Rippling then copy and paste this block into Rippling.
{
    "assessmentAccessURL": {
        "uri": "https://www.ondemandassessment.com/verify/index/AAA1111ZZZZ"
    },
    "expiryDate": "2023-03-01T12:00:00.000Z"
}
That's it. Click Save.
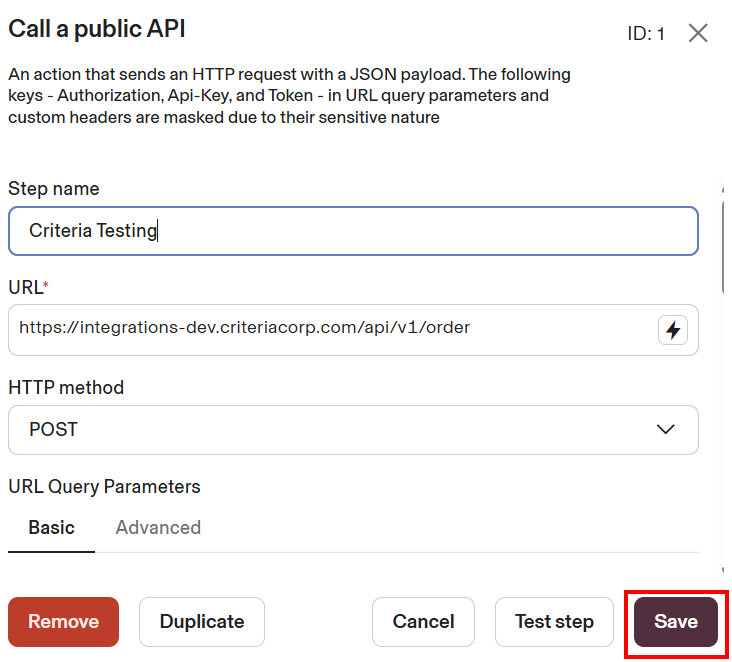
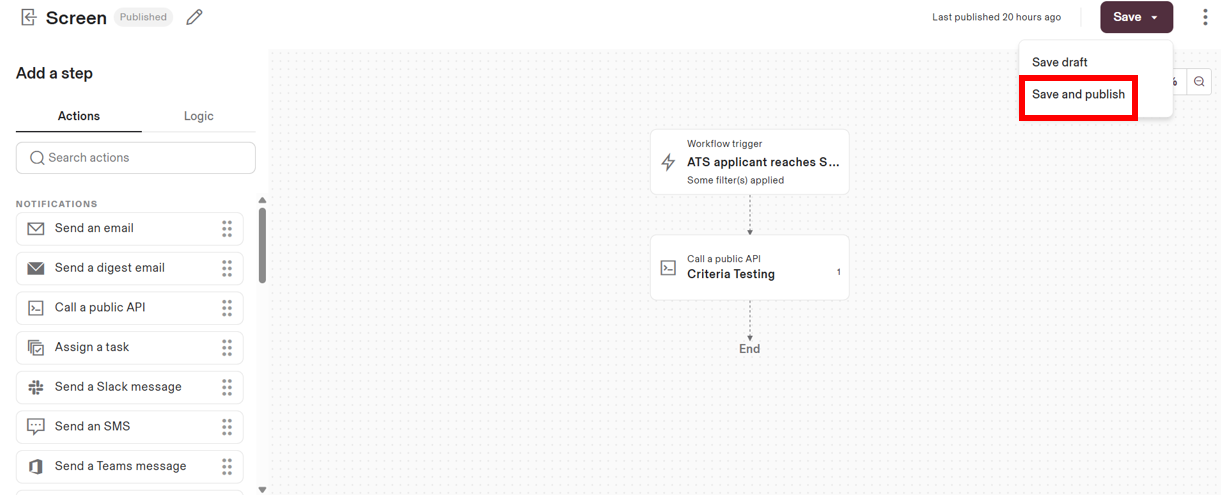
This workflow only requires this 1 step. Select Save and publish.
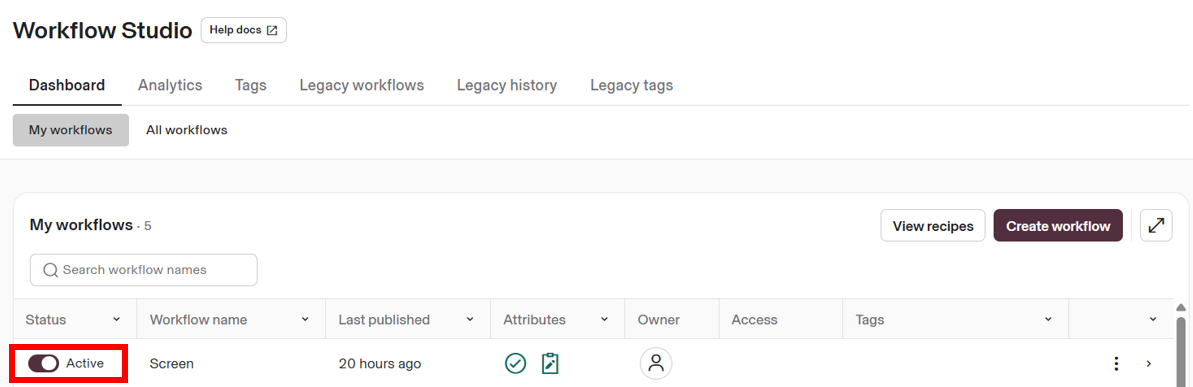
Back on the My workflows list, ensure the toggle under the Status field is turned on to Active for your new workflow.
If you would like to trigger Criteria testing on multiple workflow stages, repeat this process and configure another workflow to be applied to the next status.
Using the Integration
Create Requisition
When you create a Requisition in Rippling, you need to ensure that you set up a mapping in the custom integration package in Criteria. If you forget this step, candidates won't be invited from this requisition.
Refer to below for steps on how to add a mapping to the package in your Criteria account.
Trigger on Application
If you have set up your Criteria testing to be triggered by a new application being created, each candidate will be automatically invited for testing in Criteria when they apply.
However, you do need to ensure that when you create a new Requisition in Rippling, that you set up a mapping in the custom integration package in Criteria. If you forget this step, candidates won't be invited.
Once they apply, Rippling will use the Workflow Studio rule you set up to ask Criteria to invite the candidate.
The Custom Integration Package configuration will be used by Criteria to determine which Criteria Job the candidate should be created in. The Criteria Job will determine the assessments/interview to invite them to, what expiry date should be set, what email template to use etc.
This should all happen within a few minutes of the candidate applying.
As soon as they appear in Criteria, you can use the Criteria platform directly to check on the candidate status, extend their testing, send reminders and view results once they have completed.
Trigger on Change status
If you have set up Criteria Testing to be triggered when a candidate is moved into a specific status, the testing will be triggered automatically when they are moved into that status.
Remember, you need to ensure that when you create a new Requisition in Rippling, that you set up a mapping in the custom integration package in Criteria. If you forget this step, candidates won't be invited.
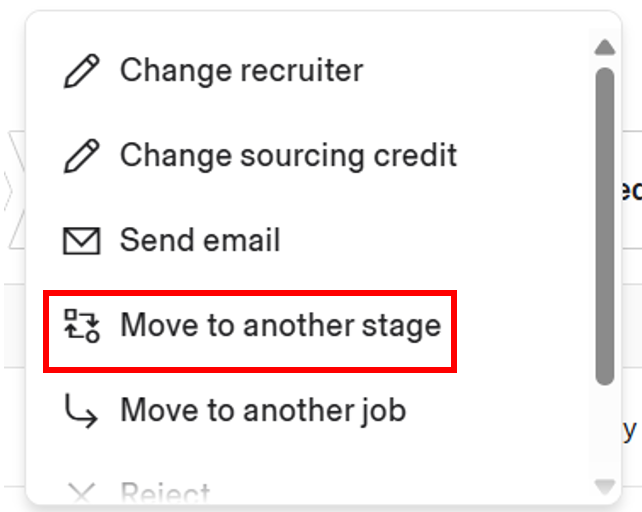
To move a candidate into another status, select the candidate(s) you wish to invite to Criteria Testing and select the three dots in the bulk menu at the bottom of the screen.

Select Move to another stage.
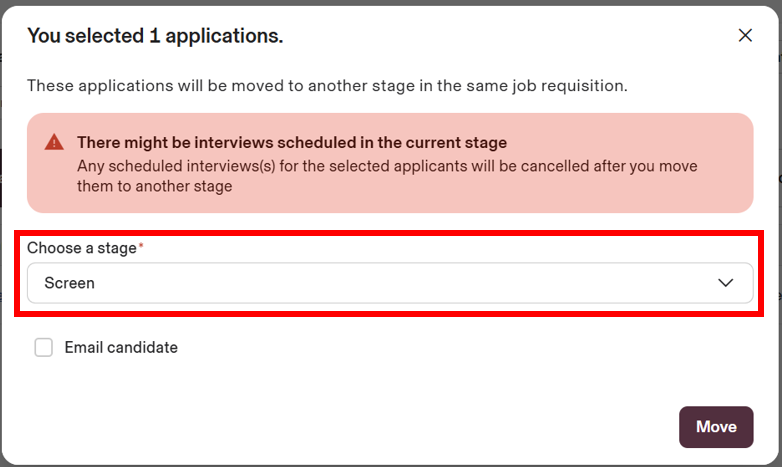
Within the Choose a stage dropdown, select the stage which has been set up to trigger Criteria Testing .
Once this happens, Rippling will use the Workflow Studio rule you set up to ask Criteria to invite the candidate.
The Custom Integration Package configuration will be used by Criteria to determine which Criteria Job the candidate should be created in. The Criteria Job will determine the assessments/interview to invite them to, what expiry date should be set, what email template to use etc.
This should all happen within a few minutes of the candidate being moved into the new status.
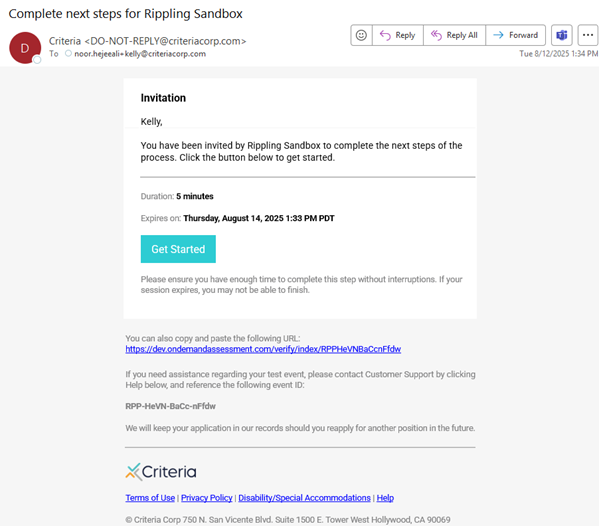
The candidate will receive an invitation email from Criteria.
Once the candidate appears in Criteria, you can use the Criteria platform directly to check on the candidate status, extend their testing, send reminders and view results once they have completed.
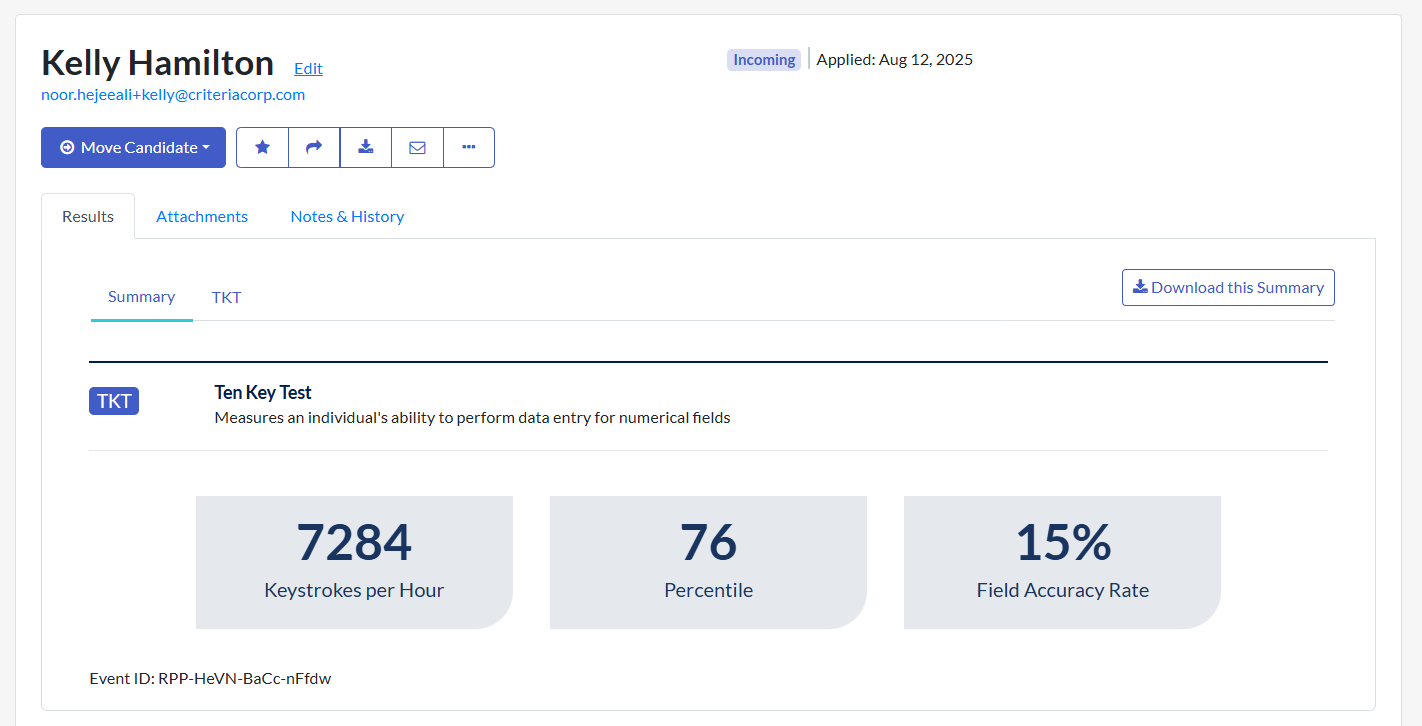
Viewing results
Once a candidate has completed Criteria Testing, the results will be available in the Criteria Platform. The overall score(s) per assessment along with the Talent Signal and/or Met Scores will be available within the Criteria Platform.
Criteria platform users may also configure for completion notification emails to be sent to alert them to new results being available in Criteria.
Ongoing
Add a Mapping to a Criteria Custom Integration Package
Each time you add a new Rippling requisition you need to add a mapping to the Criteria custom integration package to tell Criteria what testing the candidates in this requisition should complete.
Login to Criteria as an Admin user. Click on your avatar at the top right, and then select the Integrations menu. Click Manage Custom Packages.

Click the 3-dots and choose Edit next to the package that relates to the Rippling stage that you wish to trigger testing from.

In the Job Mappings section, click the + Add Job Mapping link to add a new mapping row. In the new row, paste in the Rippling Requisition ID and Name. Then choose the corresponding Criteria Job that the candidates should be invited to when they are invited from that Rippling requisition. When selecting a Criteria Job, type the job name into the drop-down list to filter the list to easily select the item you are looking for.
Click Save.
You can now start triggering Criteria testing from the new Rippling Requisition.
Remove Integration
If you no longer wish to use the integration with Criteria, go into Workflow Studio in Rippling and inactivate or delete the workflows that relate to Criteria.
Notify Criteria so they can check that there are no more notifications coming from Rippling and the integration can be disabled in Criteria too.
Troubleshooting
Candidates not being invited in Criteria
If candidates aren't being invited:
- Check the Custom Integration Package has a mapping for the Rippling Requisition. Login to Criteria and edit the custom integration package used by the stage that should have triggered testing for your candidate. Check there is a mapping for your requisition. If not, add it now.
- If all seems in order in Criteria, you can check the Execution history for your Workflow rule in Rippling. Refer to instructions below.
Once you have resolved the issue, if your testing is triggered via a status change in Rippling, just move the candidate out of that stage and then back into that stage and the integration will try to invite them in Criteria again. If your integration triggers the testing on application, you will need to add the candidate into Criteria directly as there is no way to trigger this again.
How to check Execution History in Rippling
Rippling logs all the times the workflow trigger tried to send data to Criteria. Use these logs to investigate errors. Don't worry if you don't know what the errors mean, just provide screen shots to Criteria Support and they can investigate.
Go to Workflow Studio in Rippling.
Next to the workflow rule in question, click the arrow to expand that rule information.
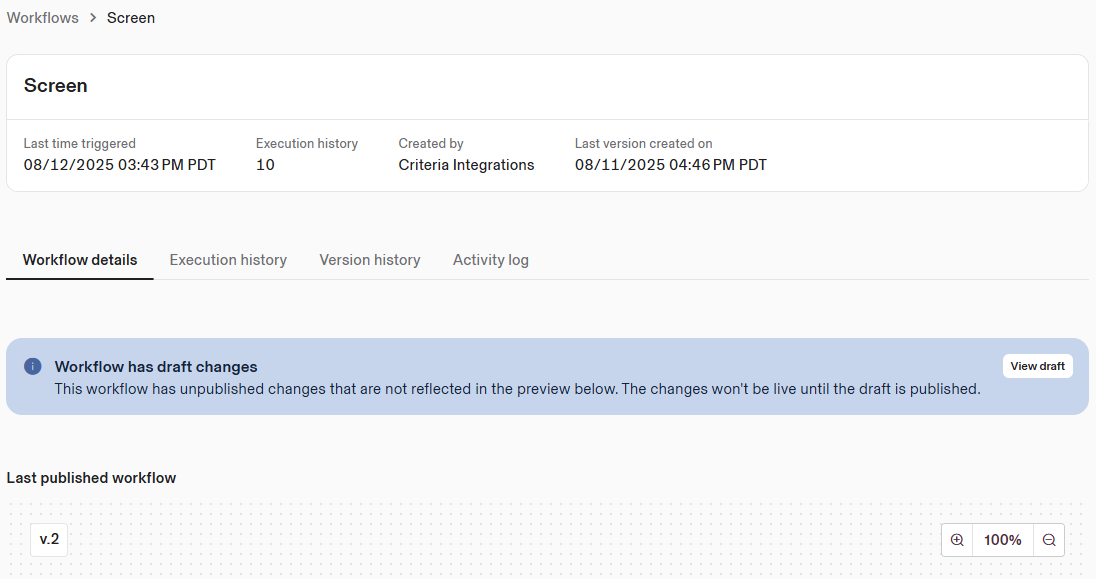
Click to the Execution history tab
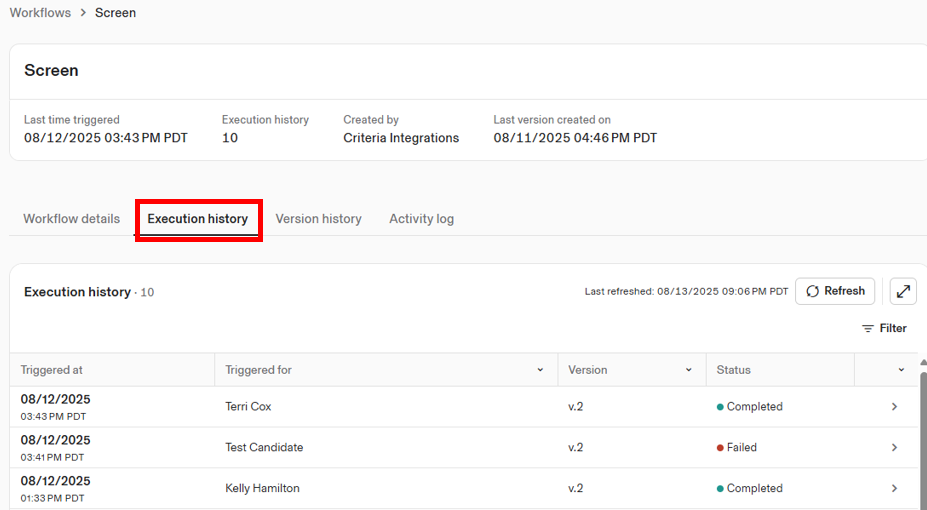
This screen will show you all the times that workflow has been executed.
A Completed status indicates that it was successful in inviting the candidate in Criteria. A Failed status indicates the candidate was not invited in Criteria.
Look down the list for the candidate name in question, or just look at the Failed entries. Click on the arrow next to the item you wish to look at.
A Failed execution will have a red box with an error message.
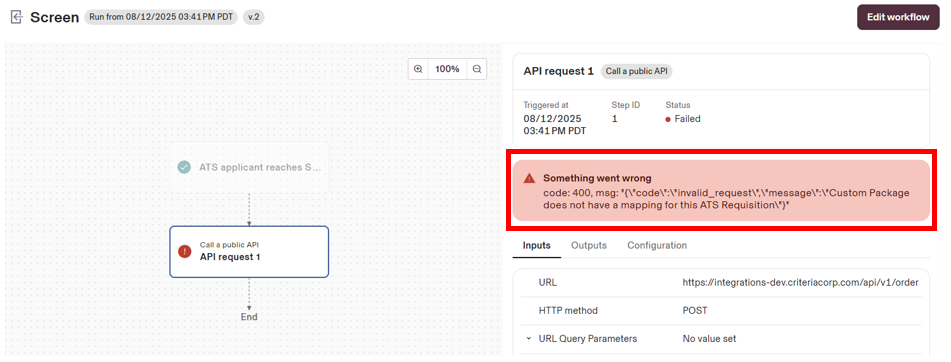
This one says "Custom Package does not have a mapping for this ATS Requisition" which tells us that candidates started applying / being moved into the Criteria status before the mapping was added to the custom integration package in Criteria. This error is easily fixed by following the instructions above.
Check what the error message says for you and reach out to Criteria Support if you are unable to resolve it yourself. Provide the text from the red box so they can see the error that is happening.
Call a public API action is greyed on
If the Call a public API action is greyed on in the Actions list within Workflow Studio, confirm your Rippling account is on the Platform Pro plan or have the Unlimited Workflow Add-on. Contact your Rippling Technical Account Manager or Account Manager to confirm the subscription plan.